Appliance Insurance Articles

Articles and Blog style posts on Appliances & Appliance Insurance

8 Common Hob Problems & Repairs

8 Common Hob Problems & Repairs

Most of your cooking is done on a hob (either gas or electric), so it can be very inconvenient when they start giving you problems. There are several different types of hobs that have different features and functions. Knowing what type of hob you’re using will help you narrow down the potential cause of the fault.

Let’s take a look at eight of the most common hob malfunctions, so that when you have to call an engineer, you can properly explain what the problem is.

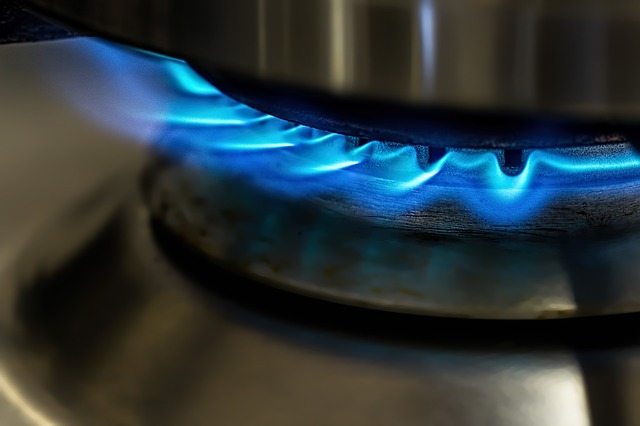
Problem 1: Erratic flames in the gas cooker

Gas hobs should give off stable blue flames if the burner is operating correctly. If the flames from your gas cooker look yellow or uneven, or if the flames look smaller than usual, this indicates that there is debris in the gas burners or jets.

A technician should remove the burner assembly and inspect for blockages around the jet and the burner head. They should then clean these parts thoroughly with water and remove the grime.

Do not attempt to clean the blockages with harsh chemicals or wires as you may enlarge the burner holes and worsen the problem.

Problem 2: Gas leak from a gas hob

If you have a gas cooker you should install a natural gas detector or a carbon monoxide detector that will sound an alarm if gas levels exceed their safety threshold. A slight whiff of gas is common from gas cookers, but if the smell of gas is stronger than normal, you may have a gas leak somewhere in the hob. Open your windows and doors to let air in and turn off the gas hob. Do not turn on any lights or light a match if the smell of gas persists in the kitchen. Call the gas agency immediately and do not attempt to fix the problem yourself.

Problem 3: Ignition not working

If the burners aren’t working it could be due to a fault in the igniter, the burner or the electronic ignition system. To find out more about this problem, read our Cooker Ignition Not Working – Troubleshoot Guide.

Problem 4: Turning on an electric hob trips the electricity

If turning on the electric hob causes your electric system to trip, you can unplug any other appliances on the same circuit and reset the fuse box. Turn on the cooker and try again. If the electrics trip again, you may need to have a technician replace the faulty hob.

There could also be a problem either with the circuit, the oven power plug or the oven itself.

Problem 5: Cooking plate of electric hob not heating up

If one of the cooking plates of your electric hob is not heating up, the cooking plate element may be faulty and you’ll need to call the appliance technician for a replacement.

Tip: You could also experience problems with the cooking plates if you use pans with uneven bases, so replace old dented pans with new ones.

Problem 6: Heating problems with an induction hob

Induction hobs are a little different from other electric hobs in that they transfer heat via magnetism. This enhances their efficiency and makes them safer to use, but it means that only pans made from ferrous material will work on them (ferrous means the material includes iron).

To check if your pan is composed of ferrous material, hold a fridge magnet to its bottom and see if it sticks. If it does, it will work on an induction hob. If your pan or pot is composed of ferrous material but the heating still doesn’t work, then the issue is with the hob itself and cooker repairs may be required.

Problem 7: Unable to adjust heat

If a burner turns on but the heat level can’t be adjusted (for example, it stays at high temperature as long as it is switched on, no matter what you do with the settings), it could be the result of a faulty ignition switch. To determine if the problem is with the switch itself, turn off all switches, unplug the burner and fit it into a different receptacle. Turn on the cooker and try adjusting the switch on that burner to see if it works. Any faulty switches should be replaced.

Problem 8: An ‘E’ symbol keeps flashing on the hob controls

The ‘E’ symbol indicates that a switch is being continually pressed. You could try cleaning the hob to remove any dirt that might be causing the error. Note, however, that cleaning might also cause the issue if any areas of the hob are still wet, so try using a hairdryer to get rid of any damp.

If none of these tips work, try rebooting the power switch for the hob. If you still have a problem, you may need to have the touch board replaced. You can call a technician to install a replacement touch board, or do so yourself if you’re confident in your ability to repair electronic devices.

Types of hobs

Now let’s take a quick look at some of the different types of hobs and the problems you’re most likely to experience.

Gas hobs

Gas hobs provide an even distribution of heat immediately. They come in two types: Standing pilot and electric ignition. Common problems with both include gas cooker rings not igniting, in which case it’s probably caused by debris, either from food or fibres from your cleaning cloth. You will have to remove the burner cap and wipe the rings clean. Use a special cloth that is not going to leave fibres or lint behind.

Make sure you dry the rings and hob properly when you clean it because any remaining moisture could cause incessant clicking when you switch it on. If the clicking persists you might need to replace the switch under the relevant knob.

Gas-on-glass hobs

These hobs have gas burners mounted on top of ceramic glass, which adds to their style and makes them easier to clean. They take longer to provide heat but they are also more precise. Unfortunately, the spiffing ceramic glass is easily stained, so you will have to use a special cream-based hob cleaner. The glass can also be pock-marked or even cracked by hot oil splashing or sugar spills or when food boils over.

Ceramic hobs

These hobs are very elegant and very easy to clean. They are electric hobs, so they have an extra element of safety if you have young children. They heat quickly and modern hobs come with touch controls. However, common problems include being cracked and broken by dropped lids or even pots and the surface is easily scratched. They are currently quite expensive to repair (if you don’t have an extended warranty) and you have to invest in special cleaners so you don’t damage the surface with anything abrasive. You may also have to buy new cookware because they don’t work with glass or copper-bottomed pots and pans.

Induction hobs

Induction hobs are gaining in popularity because they are energy-efficient and cost-effective. The downside is that, like ceramic hobs, they require special posts and pans with ferrous metal bases. It’s ok if your hob makes low-level whirring noise because it’s just the induction fan working as it should. Note, however, that repairs can be expensive.

Electric hobs

Electric hobs are usually the most affordable option. The most common problems are related to faulty switches and elements. The signs are difficulty regulating temperature, plates not switching on and tripping the electrics when you switch the hob on.

Please remember:

Appliances should be serviced regularly according to the manufacturer’s instructions, which you can found in the product manual. If you have a problem with an appliance, call an NICEIC or Gas-Safe registered appliance engineer to repair your appliance. Don’t forget that if your appliance is not working optimally, you should also have it serviced to prevent further damage.

Posted by Surewise in Appliance Insurance Articles

3 Reasons Why Your Oven Keeps Tripping Electrics

3 Reasons Why Your Oven Keeps Tripping Electrics

It’s a Sunday and you’ve planned to cook the perfect roast for the family, but as soon as you switch on the electric oven, it trips all the electrics in the house. You curse and reset the fuse box before turning on the oven again; only for the same thing to happen. Now you’re worried. After all, Sunday roast only comes once a week.

If the electric system keeps tripping, it could be due to one of numerous problems. As a general rule, if the trip occurs whenever an electric oven is switched on, then it’s usually a problem with the circuit or the wiring. If it occurs when a specific function on the oven is used however, then it may be because a component linked to that function is faulty.

Need Home Appliance Insurance? – Cover for oven and more home appliances Click Here for a one step quote!

There are a number of checks your technician can perform to narrow down the potential cause of the trip. Here are a few examples:

1) Problem with the circuit

The technician will check for a circuit overload. As a first step, they will look to see if there are multiple appliances connected to the same circuit as the electric oven. If that is the case, then unplug the other appliances and switch on the oven again. It should no longer trip. You may then have to upgrade the over circuit to increase capacity or add the appliances to a different circuit – there is usually a separate circuit for ‘Plugs’.

If there are no other appliances connected on the same circuit, they are likely to perform the following checks:

  • Using a clamp-on ampmeter, they will measure the current power load on the circuit when the oven is on. If the load is to great for the circuit, you will have to upgrade.
  • Electricity could also be tripping if there is a faulty circuit breaker or a problem with the wiring in the circuit. Have a qualified electrician check for any damage in the insulation of the circuit wires. For the electrician to test the circuit breaker, he could swap it with a breaker of the same rating from another working circuit.

2) Problem with the oven power plug/wiring

A technician can measure the current when the oven is off. This should normally read zero. If the current is > 0.3A, then the oven wire could be damaged. After unplugging the appliance a technician can inspect the power plug for any soot or damaged wiring.

Some manufacturers equip ovens with terminal blocks designed to be used across Europe. In order for these to be compatible with UK circuits, the links need to be positioned in the correct way. So if you’ve recently purchased the oven, check the user manual for Instructions on how to correctly position the links.

If it’s an older product, however, check to ensure that the terminal block is still in workable condition. Terminal blocks tend to deteriorate over time, in which case it will need to be replaced; be sure to seek advice from a technician as to which would be the correct model to purchase.

3) Problem with the oven components

To check if there is a problem with the electric oven itself, ensure that no other appliances are connected on the same circuit. Turn on the oven at a low temperature. If the electricity doesn’t trip immediately, this confirms that there is no short in the fuse into which it is plugged.

Now raise the temperature of the oven. If the electricity trips when it reaches a higher temperature, there is most likely a problem with one of the heating elements. You need a new element to solve the fault. Call out an appliance technician to replace it for you.

Other components that could potentially cause your electrics to trip include:

  • Selector switch (used to change oven functions)
  • Fans
  • Thermostats
  • Internal lamp

Through a process of elimination you can determine the general area in which the fault is occurring, by selecting certain functions to see whether the oven only trips when those functions are being used.

There are also certain tools designed to measure components in ovens to see if they are working correctly. You can find detailed information on how to test the thermostat on UK Whitegoods, for example. However, it’s recommended you seek the assistance of a technician if you are not trained to work with electronics.

Electricity tripping can be due to a short circuit at any place in your home. If a household appliance trips more than once or twice, you must contact a qualified electrician to look at the problem.

Please remember:

Appliances should be serviced regularly according to the manufacturer’s instructions, which are detailed in the product manual. If you have a problem with an appliance, call an NICEIC or Gas-Safe registered appliance engineer to repair your appliance. Don’t forget that if your appliance is not working optimally, you should also have it serviced to prevent it from seriously damaging the appliance.

Need Home Appliance Insurance? – Why Surewise.com Benefits Reviews & FeedbackGet a Quote
Posted by Surewise in Appliance Insurance Articles

5 Simple Checks for Freezer not Freezing

5 Simple Checks for Freezer not Freezing


Having your kitchen freezer break down can be expensive both with regard to the frozen food that spoils and the cost of having your freezer repaired.

If your freezer suddenly stops working or becomes ineffective, perform the following quick checks:

  1. Check for excessive ice in the freezer: Excessive ice in the freezer prevents the cold air from circulating. If you see an unusual build up of ice in the freezer, defrost the freezer completely. Now plug in the freezer to check if it is working as before.Remember, this may only be a temporary solution. As a normal process, self-defrost freezers turn off the compressor for a few minutes every 6-12 hours. Repeated excessive build up of frost in the freezer means that the freezer’s auto-defrost system is not working. Therefore, either the defrost heater, the defrost thermostat, or the defrost timer have a fault. This needs the attention of a professional appliance repair person.
  2. Check the thermostat: Perhaps the thermostat is stuck. Try turning it up and down again, and see if it clicks when you turn it. Set the temperature at the level recommended in the appliance manual and use a fridge thermometer to check if the problem has been resolved. If not, then you may have to replace the freezer thermostat.
  3. Check if something is blocking the freezer fan: Excess loading of the freezer renders the cooling system ineffective. Remove any food items that may have been stacked against the freezer fans. Also, if you cannot hear the fan operating when you open and close the doors, then you need to call a technician.
  4. Check the freezer door seals: If you see that the freezer door is not closing completely, check for damage of the freezer door seals. Sometimes simply cleaning the freezer door for any debris that may have accumulated can solve the problem. In case the freezer door gasket is damaged, it would need to be replaced by an appliance professional.
  5. Check the coils: All freezers have coils. These coils contain the refrigerant that absorbs the heat inside the freezer. If there is dust on the coils, the cooling function of the coils is affected. Unplug the fridge and very gently clean the coils with a vacuum cleaner or a dust magnets. If you are not sure how to do this, call a repair person.Your freezer may also not freeze for the following reasons:
    • There is a gas leakage, or a blockage that is restricting the gas flow in the fridge freezer
    • A noisy compressor indicates damage to the compressor motor. This part can be expensive to replace. Depending on how old your freezer is, it may be a wise decision to buy a new freezer.

Please remember:

Appliances should be serviced regularly according to the manufacturer’s instructions – found in the product manual. If you have a problem with an appliance, call in a NICEIC or Gas-Safe registered appliance engineer to repair your appliance. Don’t forget that if your appliance is not working optimally, you should also have it serviced to prevent causing damage to the appliance.

Posted by Surewise in Appliance Insurance Articles

Cooker Ignition Not Working – Troubleshooting Guide

Cooker Ignition Not Working – Troubleshooting Guide

If you take good care of your appliances, checking for problems regularly and cleaning them properly, chances are that they will last longer and save you money in the long-run. To take proper care of your cooker (and other appliances) it’s a good idea to learn a little bit about the workings and possible problems that can crop up. This means you can carry out some quick DIY if the problem is a simple one and you’ll save money by not having to call out the technician something annoying goes wrong.  After all, good maintenance is always preferable over costly repairs.

Some of the most common problems cookers relate to ignition issues, simply because igniters are used so frequently.

Generally, gas ranges these days have one of 3 basic ignition systems:

  • Pilot ignition: It’s a mechanical system that needs to be lit manually.
  • Hot surface ignition: It’s an electronic system with a glow bar or glow coil – aka an ignitor.
  • Spark ignition: It’s an electronic system and often cookers with this type of ignition have different systems on the oven and the range.

There is an older style (early to mid-1970s) electronic ignition system that can also still be found in some cookers: The ‘constant’ pilot electronic system. However, chances are that your cooker has a much more modern ignition system, unless you’re cooking with a family heirloom.

Obviously, the exact problems differ from cooker to cooker, but there are some commonalities that apply to malfunctioning ignitions.

Remember: If you have to call a technician, ensure they’re Gas-Safe registered.

If you want to try a DIY solution – only if you are confident in your abilities, because if you tinker and make things worse it could affect the validity of your claim – then you can try some of the following trouble-shooting tips.

Check the burners

Turn off all the burner dials and switch off the main gas supply. Lift the hinged top of the and check to see whether there are bits of food clogged around the ignition. If you see a build-up of grime and food, clean the burners by wiping them down gently with a soft damp cloth. Use a magnifying glass and needle to clear as much of the muck between the igniter and gas supply as possible.

Is the burner clogged up with grime from the metallic tubes?  Clean tubes, holes and valves carefully with a damp cloth rinsed in vinegar.  Turn on the gas supply and test again.

These are both delicate jobs, so if you aren’t comfortable, call in a Gas-Safe technician.

Note: If you have problems with one burner, another might be about to give notice. It’s a good idea to check them all just to be sure.

Gas supply

If this doesn’t do the trick, try checking your gas supply line and check the oven’s system. If your stove-top ignition system is working, but there’s a problem with the oven’s system then you don’t have a gas supply line issue but a problem with the oven’s system. Take a look at your gas levels in the gas tank to make sure the tank isn’t empty.  Double check the valves by turning to them on, if there’s no gas they won’t light.

Electronic ignition system

If you still have no luck in getting your cooker to work, try testing the electronic ignition system. If there’s no spark when you switch on the burner, there might be a problem with the electric circuitry. Check that all the plugs are plugged in and the electricity is on. If it trips there’s a problem in the circuit breaker. Switch off the current and check for loose wires between the igniter and the burner assembly. If there’s still a problem with the ignition system, it could be the igniter switch, in which case it’s time to call the Gas-Safe Technician.

Problems with the igniter

Check the igniter for sparks. Turn the gas off and try the ignition button on your stove. You should hear the ‘clicking’ sound, check whether there are sparks, if not then it’s time for a new igniter. The igniter could also be clogged with dirt. Clean the igniter with a toothbrush to remove dirt and debris. Gently scrub the surface of the igniter with the toothbrush and softly blow on it when you’re done cleaning. The igniter is located in different places in different cookers, but generally you can find it near the burners for the oven. You may need to remove the bottom oven cover to expose the igniter.

Calling a technician

When you do call in a Gas-safe registered technician, explain the steps you’ve been through. The technician might repeat them to double check the problem, but at least they will know that what’s been tried and where the potential problem could be.

Please remember:

Appliances should be serviced regularly according to the manufacturer’s instructions, which are in the product manual. If you have a problem with an appliance, call in a NICEIC or Gas-Safe registered appliance engineer to repair your appliance. Don’t forget that if your appliance is not working optimally, you should also have it serviced to prevent further damage.

Posted by Surewise in Appliance Insurance Articles

5 Quick Checks for Fridge Freezers Not Working

5 Quick Checks for Fridge Freezers Not Working

The fridge freezer is an essential appliance for a fully functional kitchen. Good fridge freezers are silent hard working machines that operate round the clock to safely store your food supplies.

However, at times a few glitches may cause your refrigerator to stop working or become ineffective. Common symptoms are:

  • It stops cooling
  • The fridge light does not come on
  • The appliance starts making some strange noise that you have never heard before.

Before, assuming that there is a major electrical problem with your appliance, we recommend you do the following quick checks.

  1. Check the power cord: If your refrigerator stops working or if the light does not come on when you open your refrigerator door, the problem is likely due to a loose power cable. Pull the fridge away from the wall, and check whether the plug is firmly fixed into the socket. In addition, unplug it and inspect the electrical cord. Have it replaced immediately by an electrician or technician if you suspect any damage. Also, ask the electrician to check for any blown fuses in your house or tripped circuit breakers in the appliance’s circuit breaker box.
  2. Turn power off / reset: If the electrical cord is not the problem, you can try turning off the power to the fridge and starting it again. Also, check the appliance manual on how to reset your fridge freezer to ensure that there is no problem with the settings.
  3. Check the seals and the gaskets: If the light remains on when you close the refrigerator door, the problem is most probably on the door seals and the gaskets. Check the door seals for cracks and rips. If the seals and gaskets are broken, an appliance engineer should replace them.
  4. Check the thermostat: It is possible that the thermostat temperature has been accidentally turned up, causing the interiors to be warmer than usual. Ensure that the thermostat is at the ideal temperature recommended by the manufacturer.
  5. Check the freezer: The refrigerator and the freezer have different controls and can malfunction separately.
  • The freezer fan may be blocked.
  • Condenser coils located beneath or behind the appliance may have collected debris. This would prevent the freezer from cooling properly.
  • There could be a problem with the defrost timer. The refrigerator compressor goes silent when it is in automatic defrost mode, which lasts between 30 minutes to an hour. If the compressor motor does not start after this time, the defrost timer may need replacement.

Please remember:

Appliances should be serviced regularly according to the manufacturer’s instructions – found in the product manual. If you have a problem with an appliance, call in a NICEIC or Gas-Safe registered appliance engineer to repair your appliance. Don’t forget that if your appliance is not working optimally, you should also have it serviced to prevent causing damage to the appliance.

Posted by Surewise in Appliance Insurance Articles

6 Causes For Beeping Fridge

6 Causes For A Beeping Fridge

You know your refrigerator is in perfect working order when it is not making any noise. On the other hand, a beeping sound indicates that something is wrong with the appliance. It could be a minor problem that you can resolve in minutes or something far more complex that needs professional attention.

The first thing you need to do is check the fridge manual to understand what the beeping signifies and what you can do to stop it. If you cannot find the relevant information, simply unplug the fridge for a few seconds and plug it back in. If it was a minor hitch, the fridge should stop beeping.

However, if the beeping persists, do a quick check for the following:

  1. Check if fridge and freezer are overfilled: Over-stuffing of these compartments will prevent the doors from closing properly and can cause the fridge to set off a beeping alarm.
  2. Check the fridge door seals: Broken or damaged door seals may prevent the fridge from closing. This can also happen if the seals are dirty. Wipe clean the door seals with a soft cloth and warm, soapy water, and close the fridge doors. If the door still appears ajar, then you need to replace the door seals.It is also possible that the inbuilt door-alarm (which sets off if the fridge door is ajar for more than a few minutes) has tripped. This would need to be looked at by a qualified repair technician. Until, you can call a technician, transfer all the food items to another cool place.
  3. Check the fridge balance: To function properly the fridge must be placed on a levelled surface. Even a slight tilt in the fridge structure can set off a beeping alarm. Check if the fridge is balanced evenly.
  4. Check if the fridge exterior is warmer than usual: Check if there is adequate distance between the fridge and walls to allow for proper ventilation. If you have already ensured this, and the fridge exterior still appears warmer than usual, have an appliance engineer look at the problem. If the beeping continues, switch-off the fridge.
  5. Check the freezer: If your fridge does not have an auto-defrost function then excessive ice-build up in the freezer can cause the beeping alarm. If you see a lot of ice build-up in the icebox or freezer, switch off the fridge and let the ice thaw. Once the fridge is thawed, the beeping should stop.
  6. Have a technician check the circuit board: It is possible that there is a problem with the appliance’s circuit board. If so, it will most likely need replacement.

Please remember:

Appliances should be serviced regularly according to the manufacturer’s instructions – found in the product manual. If you have a problem with an appliance, call in a NICEIC or Gas-Safe registered appliance engineer to repair your appliance. Don’t forget that if your appliance is not working optimally, you should also have it serviced to prevent causing damage to the appliance.

Posted by Surewise in Appliance Insurance Articles

8 Reasons For Beeping Dishwashers

8 Reasons For Beeping Dishwashers

Having your dishwasher breakdown is a massive inconvenience. The thought of all those long years of peace in the household giving way once again to bitter conflict as struggle ensues over who has to wash the dirty dishes. But the good news is that the dishwasher is the most likely to appliance to malfunction as a result of simple issues that can be easily resolved, without requiring expensive dishwasher repairs.

Furthermore, unlike geysers and circuit boards, fixing a dishwasher is not a matter of urgency. So you have time to troubleshoot the fault and see if it is one of the many issues that you can resolve yourself. Here are just a few examples of common dishwasher problems:

Safety First: The first thing to bear in mind is that a dishwasher is an electrical device, and thus you are required to follow electrical safety guidelines when carrying out DIY dishwasher repairs. If you suspect the problem requires electrical work to fix, take the safe option and call a professional, unless you have experience working with electronics. Electrical components will usually be located in the door and at the base, and can be accessed via the inspection panel or by removing the inner door. These parts can carry current even when the dishwasher is switched off and unplugged.

Dishwasher won’t turn on

  • The first thing to do is check the plug and socket. Try plugging another small appliance into the same socket and see if it works. If it does, the problem is with the dishwasher.
  • Check the dishwasher door is properly closed.
  • Check to see if the dishwasher door latch is broken. Most dishwasher door latches are made of plastic, and if they’ve degraded to the point where they can’t hold the door closed then the dishwasher won’t start.
  • Try resetting the dishwasher. You can find instructions on how to do this in the manual.
  • Was there a power surge? Again, reset the appliance by pressing the reset button. In addition, some dishwashers have their own circuit breakers which can be reset.
  • Other components that could prevent the dishwasher from turning on are the thermal fuse, the door switch and the main control board. Checking the condition of these components will require you to remove the control panel, so you may want to contact a professional unless you’re familiar with the inner workings of a dishwasher.

Dishwasher not Draining

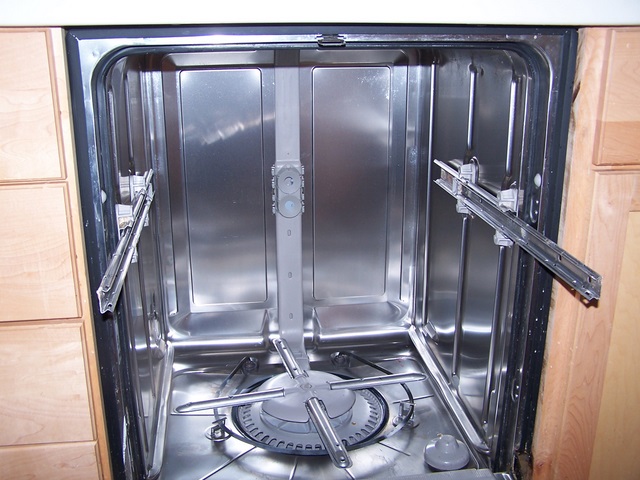
This is usually a problem with the dishwasher drainage systems or with the house plumbing. Here are some routine checks you can make before calling a professional:

  • Remove, clean and replace the filters. You’ll find them in the bottom of the dishwasher, and they’re easy to twist and pull out.
  • Pull the dishwasher away from the wall and check the waste hose. If it’s squashed it may not be able to drain properly.
  • A blockage in your sink could also prevent proper drainage, if the dishwasher waste water pipe is connected to it.

Dishwasher making beeping sounds

If your dishwasher starts beeping, it is probably a sign of either incorrect use or a part that needs replacing.

Electronic appliances such as dishwashers often come inbuilt with electronic sensors, which may make beeping sounds or display blinking lights to caution the appliance user that something is wrong. It is important to note here that the combination of beeping and lighting display mean different things in different dishwasher models.

Turn off the dishwasher and check for any of the following that could be causing your dishwasher to beep:

  • Did you open the dishwasher door before the cycle was complete? If so the appliance may memorise the cycle status and will not start a new cycle the next day. Check your appliance’s instruction manual on how to reset the appliance.
  • Have you added rinse aid or coarse salt? Check your dishwasher handbook on how to refill this.
  • Have a technician check the pressure switch or flow meter.
  • Have a technician check the reed sensors for normal wear and tear – these detect obstruction to the dishwasher spray arms.
  • Is the dishwasher beeping in tandem with blinking lights? This may indicate anti-flood device activation. This means that the dishwasher sensors have detected water in the casing and has stopped working to prevent the water in the drum from leaking over your floor. If it is an integrated model, sponge off water in the base. If it is a freestanding appliance, tilt the machine slightly to drain out the excess water.

Prevent dishwasher problems by keeping it in good condition

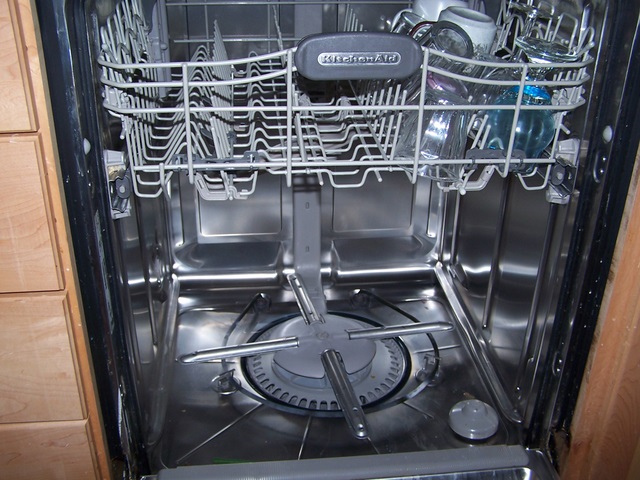
It is estimated that you save three weeks a year by using your dishwasher! Regular cleaning and maintenance of the dishwasher will ensure that it continues to work without developing a fault and so saves you hours every week.

Also be sure to read the dishwasher instruction manual. According to service engineers on UK White Goods, most dishwasher problems are down to people not knowing how to look after their dishwasher because they didn’t read the instruction manual.

Please remember:

Appliances should be serviced regularly according to the manufacturer’s instructions found in the product manual. If you have a problem with an appliance, call in a NICEIC or Gas-Safe registered appliance engineer to repair your appliance. Don’t forget that if your appliance is not working optimally, you should also have it serviced to prevent causing damage to the appliance.

Posted by Surewise in Appliance Insurance Articles

Dishwasher Gives Shock – What to do?

Dishwasher Gives Shock – What to do?


If your dishwasher has started giving the person who touches it a shock, it is time to call in a skilled technician to do some maintenance checks immediately.  If you notice that your appliance is sending out any form of electric shock, no matter how mild, immediately switch off the power socket and remove the plug from the socket. It is best to also wear rubber-soled shoes when removing the plug.

Here is what could be causing the kitchen dishwasher to pass an electric shock when in use:

  1. An internal live wire may be touching the appliance chassis. Another electrical appliance with a loose wire, placed near the dishwasher, may also cause the problem.
  2. The switch used to power the dishwasher may have a loose connection or the earth wire around the socket may be broken. Have a technician use a socket-tester to rule out the problem.
  3. It is possible that the insulation around the heating element has deteriorated. Have a technician check the heating element in the dishwasher.
  4. If your dishwasher is giving an electric shock, it may mean that the safety device called the ‘trip switch’ is not working. Since electrical kitchen appliances operate in a wet area, they come with a built-in safety device to automatically cut-off power in the event that a fault leads to a shock. Unfortunately, even very well made electric appliances can malfunction.

Here is what could be causing the kitchen dishwasher to pass electric shock when NOT in use:

  1. If the dishwasher is off and you still get a voltage when you touch it, there could be an earthing fault with the electrical supply. In case of an earthing problem, even a malfunctioning appliance in your neighbour’s house can give you an electric shock. Consult an electrician immediately.
  2. Getting a shock from the dishwasher when it is off could also be due to a faulty capacitor or suppressor.  These parts hold charge for up to 5 minutes after the appliance is unplugged and can give you a nasty shock.

Please remember:

Appliances should be serviced regularly according to the manufacturer’s instructions – found in the product manual. If you have a problem with an appliance, call in a NICEIC or Gas-Safe registered appliance engineer to repair your appliance. Don’t forget that if your appliance is not working optimally, you should also have it serviced to prevent causing damage to the appliance or harm to you or others.

Posted by Surewise in Appliance Insurance Articles

Top 10 Quiet Fridges

Top 10 Quiet Fridges

It’s enough to drive you crazy if you’re already feeling a bit on the sensitive side thanks to a headache or just a desperate need for peace and quiet. A noisy fridge may just seem annoying at first but the more that humming and vibration persists the more irritating it becomes until it seems to have amplified everything out of proportion and you’re almost ready to unplug the darned fridge and throw it out the window.

If you suffer from ‘noisy fridge syndrome’ then you’ll be glad you’ve found this post because on it we’ve researched and found  what we believe are 10 of the quietest fridges out there. All received a top 5/5 score by Which for the noise and vibration category.

But first, why are certain fridges noisy in the first place?

Possible reasons your fridge is noisy

The compressor (i.e., motor) makes a noise while it circulates the gas necessary to keep the fridge cool. This runs for more than half the time that the fridge is switched on. Newer, and more expensive, fridges contain linear compressors which operate in the same manner as a dimmer switch ie they only use as much power as is necessary which means the fridge runs at a quieter level.

Some frost-free fridge freezers can make a whirring noise which is the result of a build-up of ice around a fan and means the fridge isn’t cooling properly so should be looked at.

Certainly though, one of the first things you should try if your fridge noise levels are at a higher decibel than you’d like, is to defrost it and see if that makes a difference. If not, if may be time to call in a fridge repair man or buy a new one depending on your current financial position.

Our top 10 quiet fridges:

  • Beko CHILL53W. Costs around £130.
  • Liebherr T1404. Costs from £230.
  • Hotpoint RLA36P. Retails from £190.
  • Beko TLD673APS. Costs around £280.
  • AEG S71700TSW0. Retails from £270.
  • Siemens KU15RA51GB. Costs from £380.
  • Smeg FAB10RR. Retails from £650.
  • Neff K5604X7GB. Costs from £420
  • Miele K12820SD. Retails around £720.
  • John Lewis JLUCLFS6007. Retails at £320.
Need Home Appliance Insurance? – Cover for all your home appliances Click Here for a quote!
Posted by Surewise in Appliance Insurance Articles

Top 10 High Capacity Dryers

The Top 10 High Capacity Dryers

If you’re a big family then you absolutely want to be buying a high capacity tumble dryer. That’s one that can take at least 8kg in one load.

In reality your dryer should actually have twice the capacity as your washing machine so that there’s enough room in the dryer for your laundry to come out fresh and ready to wear (it makes sense!). A larger dryer, provided you have the laundry to fill it, is much more economical since it means you can dry more at the one time and have the machine on less

Best big tumble dryers

  1. Hoover’s Dynamic (9kg). Energy efficient with a delay start mechanism and four levels of sensor drying, the Dynamic has easy empty drawers and an LED display. Costs around £300.
  2. LG RC9011 (8kg). Quiet and reliable this LG machine has an energy saving mode and a choice of programmes with options. Comes with sensor drying to cut down on electricity costs. Costs from £500.
  3. Hotpoint TCM580P (8kg). This condenser dryer has a fast drying cycle and is quiet too. Energy efficiency isn’t great but it’s not bad either. Very easy to use. Costs £250.
  4. Bosch WTE84309 (8kg). Has a decent energy efficiency rating and some nice functions such as ‘sportswear’ and ‘reduced ironing.’ Has sensor and LED display screen showing how much of the cycle is left. Costs £400.
  5. Whirlpool AZB97801 (9kg). Machine has ‘6th sense colour technology’ which the company says preserves fabric colours. Decent energy efficiency and has an LED display screen. Four drying levels. Costs £500
  6. Indesit IDCA8350BH (8kg). Fast and even drying of laundry and very easy to use. Door lies flat against body of machine giving good access. Costs around £230.
  7. LG RC8015C (8kg). Very efficient drying sensor which gets all fabrics dried evenly. A sturdy machine that is easy to operate with a light inside the drum and large type on the LED display screen. Retails from £500.
  8. Candy GOV580C-80 (8kg). A vented dryer which is very energy efficient and different heat settings for delicate clothes. Effective drying sensors. Price £160 upwards.
  9. Hotpoint TCEM80C6G (8kg). Fast and even drying of laundry with this condenser dryer; especially when it comes to cottons. Light indicates when the water tank is full. Costs around £250.
  10. Candy GCC 590NB (9kg). Has a very effective iron-dry programme which makes clothes damp and easier to iron. Senor drying but can override it to a manual setting. Costs from £300.

What’s your experience with large capacity tumble dryers? Is there one we haven’t included on our list that you think should be there? Please let us know.

Need Home Appliance Insurance? – Cover for all your home appliances Click Here for a quote!
Posted by Surewise in Appliance Insurance Articles