What is the Best Spin Speed for Washing Machine?

Does Washing Machine Spin Speed Matter When Washing Laundry?

First things first: What does the washing machine spin speed do?

The spin cycle comes at the end of the wash to remove as much excess water as possible. The cycle speed is the difference between damp laundry and less damp laundry. This affects the drying time on the washing line and in the tumble dryer.

Damp and less damp, is that really the only difference?

Well, in most cases, yes.

Does the washer spin speed really matter, then?

Yes it does, but usually only when it comes to the type of fabric washed.

Let’s take a closer look

Spin speed is measured in revolutions per minute (RPM). The higher the spin RPM on a washing machine the faster the drum turns and the drier the clothes at the end of the cycle.

The drier the clothes come out of the machine, the faster they dry on the line and in the tumble dryer.

There are 1800 spin speed washing machines on the market – turning 1800 times per minute! The most common, however, are 1400 spin speed washing machines.

The lowest washing machine RPM speed is 400. If you’re washing a normal load, it doesn’t make sense to go down to 400RPM as your clothes will come out damper than is ideal. But, this setting is perfect for delicate fabrics, particularly silk.

Spinning silk at high speeds can damage the fabric, weakening it so it tears easily.

More robust fabrics, including cotton, wool, and denim can withstand much higher speeds, going up to 1400 (or 1800) to really wring them dry

Bear in mind that higher speeds are more ‘violent’ and your clothes may come out creased as a result. This is particularly true for cotton work or dress shirts and blouses. So, while high speeds are good for cotton fabrics, it’s not necessarily best for your smart clothes. Unless, that is, you love ironing. If you love ironing then by all means spin the bejesus out of your washing.

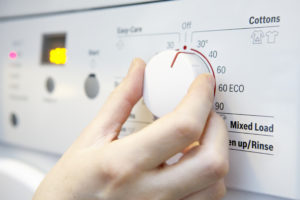
Selecting washing machine spin speed

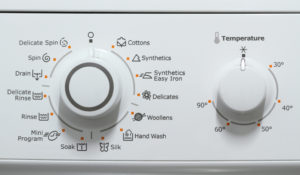
You generally don’t have to figure which is the best spin speed for your washing machine because it is preset with particular cycles.

So, if you are washing a load of delicates and you select the ‘Delicate’ setting, your washer will automatically go to 400RPM.

If you’re washing blankets and towels and you select the correct setting, your washer will automatically go to the 1000RPM to 1800RPM range.

You can change the setting if you so choose. For example, if you’re stuck for time and want a quick wash, the setting might go the mid-RPM range. But if your load is mostly towels then you can change it to a faster speed.

Does the washing machine spin speed really, truly, absolutely matter?

Not when it comes to the high spin speed range: 1200RPM to 1600RPM.

According to Peter Tyson, washing machine manufacturers are pulling a tiny bit of wool over our eyes.

You see, most washing machines are made with the same kind of motor with the same speed controls. The difference is that the motors of washers sold with lower RPM are designed to cut-off the speed at the chosen maximum point.

If we assume that motors go up to 1600RPM but the washer is sold as a 1200RPM model, then the motor is disabled beyond that point.

Basically, the production costs for various models with various maximum speeds are pretty much the same across the board. The trick is that high speeds are considered an extra feature and so manufacturers charge more for those washers.

In point of fact, the higher price is based on perceived value. We the public think that price indicates value and quality. We expect to pay more for high RPM models than low RPM models. If a brand charged much the same for low and high models, we’d be suspicious of the quality.

So, essentially, consumers dictate that:

  • We pay more for a 1200RPM model than a 1000RPM model.
  • We pay more for a 1400RPM model than a 1200Rpm model.

You can imagine the mark-up on an 1800RPM model.

Two other things that Tyson reckons consumers should be aware of when it comes to washing machine spin speeds:

  1. Your expensive highest spin speed washing machine might not hit its top speed at all. It can depend on the size and balance of the load. So you have to get it exactly right to benefit from all 1800 rotations per minute.
  2. If your washer does hit its highest speed, it might maintain it for only 30 seconds. So your high speed washer builds up speed, hits top speed, and immediately winds back down.

You might as well save yourself a couple of hundred Pounds and go for a somewhat slower model.

This is where we get back to damp and less damp

In a separate article, Tyson refers to a comparison between spin speeds and the effect on drying speed and energy used. The comparison uses a 6kg drum size and an A-rated condenser tumble dryer. Let’s look at the table.

SPIN SPEED RESIDUAL DAMPNESS ENERGY USED TO TUMBLE DRY
800 70% 4 kWh
1000 60% 3.7 kWh
1200 53% 3.3 kWh
1400 50% 3.1 kWh
1800 42% 2.6 kWh

Let’s look at the three highest speeds. In terms of residual dampness and energy used to tumble dry their performance is very similar. There is a fair difference between the performance of 1400 and 1800 speeds but the gap is twice as big as any of the other measurements. It’s still possible to say that the difference between the two is not so great as to justify extra costs.

Also, Tyson points out that while you might think that 1800RPM is the bee’s knees, washing machines aren’t necessarily built to cope with the powerful action. According to Tyson, regardless of the size of the motor and spin speed, things like the suspension and bearings are the same. So the faster the spin, the more pressure is put on these components, and the likelier damage will occur.

In the end

It isn’t necessary to get the highest RPM washing machine to get the best results. Mid-range speeds of 1200RPM and 1400RPM deliver on efficacy and economy and are more than sufficient for the average family with average laundry needs.

The only time you really need to worry about spin speeds is when you’re washing special items like silks, delicates, blankets, and cotton shirts and blouses. Your washing machine is likely to use the correct speed based on the setting, but you can choose a speed you think will work best for your immediate laundry needs.

Posted by Jason Darkins in Appliance Insurance Articles

No Hot Water in Washing Machine! Help!

What on Earth is the matter if my washing machine has no hot water?

There are several potential reasons why you may have no hot water in washing machine. Before you go on an investigative mission to find the problem, however, take note of this:

Do not mess with your washer’s electrics if you have no electrical experience. You could unintentionally injure yourself; you could create a dangerous situation that affects your home’s entire electric system; and you could make it almost impossible for a qualified repair person to fix the problem. And, of course, you’ll negate your appliance insurance policy.

Now, let’s take a look at why your washer is not getting hot water.

  • The heating element has gone phut

One of the wonderful things about modern washing machines is that they have all sorts of systems in place to detect errors of any kind, including problems with heating water. They gauge the washing machine’s water temperature and if, according to Peter Tyson, it doesn’t reach a certain temp within a certain period of time the system will stop the wash and flash the appropriate error code.

Unfortunately, somewhat older washers don’t have displays that indicate a precise fault. They also don’t have the advanced systems that will stop the wash mid-cycle. Instead, the cycle will go on and on (and on and on) until the water eventually heats up to the correct temperature or you run out of patience and switch off the machine.

If you have an older model and you find that the washing machine is not heating water consistently, then the element might be faulty. The same is true for a modern washer that registers the problem.

You can test the element to see if that is where the fault lies. However, you need specific equipment, for example, a continuity meter or multimeter. You also need to know how to use and read a multimeter; you need to know about open and closed circuits; and you need to know how to safely access the element’s connections.

You can see why it’s usually best to go straight to a professional appliance technician. If, for argument’s sake, you know all of the above and you want to test the element yourself, you’re looking for a measurement of 20 to 50 Ohms. Anything in the range indicates a functioning element; if it’s out of range then the element is faulty.

  • The element’s heat protector device is faulty

It’s unlikely that you’ve heard of a thermal overload cut-out (TOC), and that’s fine. As a layperson you aren’t expected to know the technical ins and outs of heating systems. As a matter of interest, think of a TOC as a fuse, when it trips there is probably a serious problem; for example, your washing machine’s temperature has gone sky-high.

The problem could also be idiopathic – there is no discernible reason for the TOC to trip. Call a qualified technician to diagnose and repair the problem.

  • There is a problem with the wiring

Another potential problem with your washing machine’s hot water system is defective wiring. Wiring problems can be fairly easy to spot; the wire’s plastic coating (insulation) will look burnt (or even smell burnt). The coating could be broken and the wires exposed. The wires could also be frayed.

It’s exceptionally risky to mess with the wiring on your own. The danger of electric shock is enormous. Any problem with the wiring should be seen to by a professional technician.

  • Not connected to the tap

Washing machines that heat their own water are the norm, so it’s unlikely that you’ll have to ensure that your washing machine is connected to a hot water tap. You will have to check that your washer is connected to a tap, however. No connection, no hot water in your washer.

  • Software bugs

Modern washers come with advanced software that is designed to operate the machine and monitor performance to detect and report faults. However, as we know, software is not prefect and error-free. It’s possible that there is a fault that prevents your washer from heating water for the wash cycle which the software does not detect. You will need to call a specialist – a specialist who has experience with modern washers and with your particular brand.

As you can see, a modern washing machine that heats its own water can have simple and complex faults that affect water temperature and performance. Regardless of the complexity of the problem, it’s highly recommended that you leave repair of your machine to professionals. The risks of injury and further damage are too great to chance your luck. In addition, if you muck around and make the problem worse, chances are good your appliance insurer will refuse your claim.

Posted by Jason Darkins in Appliance Insurance Articles

Washing Machine Door is Locked! Help!

My Washing Machine Door is Locked and I Don’t Know How to Open It?

Ever locked your car door with the keys inside? Or worse, locked yourself out of your house? While not on that kind of scale, it’s incredibly frustrating when your washing machine door is locked and you can’t get at your wet clothes inside.

Why in the world does a washing machine do this? And how can you get your washer door open again?

The why and the how

Don’t give into your frustration if the washing machine lock is broken and the door is jammed. Don’t try to force the door open either with tools or by yanking it until something snaps. You could turn a relatively minor problem into a disaster that the replacement of a number of (potentially expensive) parts. You could even damage the machine beyond repair, and then you’ll be really angry – with yourself.

There are several potential reasons doors stick. Let’s take a quick look:


  1. There is still water in the machine

    Washers don’t open when still full of water. This is great because it 
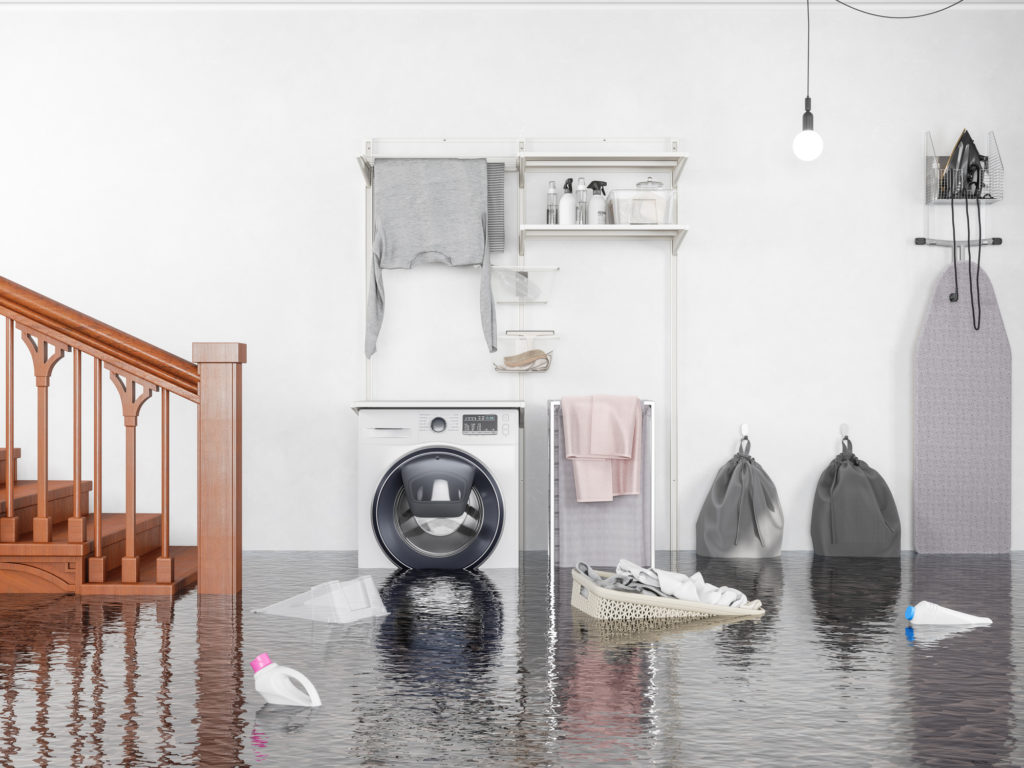
saves you a deluge if your machine suddenly has drainage problem. If you have kids, it also saves you a flooded floor should curious fingers open the door while in use.

    If there is no water in the machine and the washer has successfully gone through all the cycles, then Peter Tyson, from Peter Tyson Appliances, says that it’s likely that either the door mechanism or the actual lock is faulty.

    Some washers have a pressure switch, which keeps the door closed for as long as it detects water in the drum. In some cases, there is no water in the drum, but the lock remains activated. You’ll need to turn off the main switch so the lock cools and deactivates. It only takes a few minutes before you can open the door.

    Once again you will need to check your washer for drainage problems. If it’s draining properly then the pressure system may have failed. It’s probably best to call a professional technician to fix the fault.

  2. The door lock is faulty

    There could a problem with the interlock and this causes your washing machine door to be jammed. According to Tyson, it’s best to go through and rule out other potential faults before you go to the trouble of replacing the lock. Otherwise you just waste your time and your money.

    The interlock could also be faulty. This typically happens in certain circumstances only; the most common of which is when the machine is overworked and overheats as a result. Switch off the machine at the wall and play the waiting game. If you’re unlucky, the interlock will take hours to cool sufficiently for the door to open. Your washing might smell a bit funky from being left in a damp machine, so be prepared to do a quick rinse and spin, perhaps even a quick wash.

    An article on Gotech Repairs has some good tips on how to jimmy open a washer door that’s stuck.

  3. There is a fault with the door lock mechanism

    The mechanism comprises the door catch and the handle. If either the washing machine door latch is broken or the handle is damaged, or a component of these parts is broken, the door won’t open.

    The parts tend not to go phut suddenly; they start to give notice a fair while before they chuck it in and keep washer door firmly locked.

    You’ll need to open the door and look at the innards to find the fault and replace the part.

    Everything Homes Lifestyle Blog has a great article on how to open your washing machine door if the handle is broken.

  4. The hinge is broken

    In an article on WhiteGoodsHelp, Tyson says that in the good old days washing machine hinges were designed to last for decades. Alas, most modern washers aren’t as sturdy and it’s actually quite common for a hinge to break. Fortunately, the solution is easy enough and you should be able to replace the hinge yourself, without having to call a professional repair technician.

    You can access the hinge via the top of the washer. There are usually two screws and/or bolts that you’ll have to undo. They’re usually easy to see and easy to remove.

    Sometimes, however, you have to remove the washer door seal to reach all the screws. This is a good time to check the washing machine door seal and replace it if necessary.

    You should also be able to access the hinge from the back of the machine. So if you’re not getting any joy from above, take the back way.

  5. The child lock is on

    We mentioned above the benefits of a washing machine door lock when there are children in the home. Some washers have specifically designed a child lock mechanism; the lock could be engaged and then it’s just a matter of unlocking the door. The instruction book will tell you how to do this. It will also tell you how to deactivate the washer door lock, so you don’t have to keep fiddling about to get your clothes out.

    As with all things appliance-related (or broken-appliance-related) only tackle DIY solutions if you are confident that you won’t make the problem worse. If you attempt to fix any problems yourself and it does go pear-shaped, it’s possible that your insurance won’t approve your claim.

    Rather get a professional (preferably professionally accredited) technician to fix the lock on your washing machine for you. Your insurance is likely to cover the cost of the repair.

Posted by Jason Darkins in Appliance Insurance Articles

Washing machine detergent dispenser isn’t working. Help!

Why isn’t my washing machine detergent dispenser working?

It’s relatively common to have problems with your washing machine detergent dispenser and these often rollover into problems with your fabric softener dispenser too. Fortunately the causes are generally simple and easy to fix. Let’s take a look:

Most washing machines have automatic laundry detergent dispensers, but few of us think to clean them regularly to prevent soap and scum build-up. And that is the most common problem: Soap and scum build-up. Similarly, a clogged fabric softener compartment is the most likely reason your washer isn’t dispensing softener properly.

So, how do you fix the problem?

You clean the dispenser, of course.

How do you clean your washing machine detergent dispenser?

There are two ways to clean the laundry detergent dispenser.

The first could not be easier.

Simply put some white vinegar in the dispenser drawer and let your washing machine run through a complete cycle. You can use the quickest setting but you shouldn’t put any clothes in the machine while you’re running through the clean. The dislodged residue could stick to the laundry.

The second is also pretty easy.

All you have to do is remove the detergent drawer and give it a good clean.

Removing the drawer is simple.

All you have to do is open it fully, reach into the back and push the clip that releases the dispenser.

Wash the softener and laundry powder dispenser in warm soapy water, and make sure you get in the corners where stubborn residue tends to cling for dear life. You can use a soft-bristled toothbrush for this.

Don’t forget about the compartment itself. Residue can just as easily cling to the top and sides of the compartment so get your toothbrush ready and go in for a gentle scrub.

When you’re done, slide the drawer back in the compartment until you hear the click and your washer should be ready to go.

Ensure that you do hear the click because if the drawer isn’t in properly it won’t dispense washing powder or fabric softener.

Now all you have to do is remember to clean it regularly and make sure you use the correct products. Most instruction manuals include information on what kind of detergent to use; for example, HE (high-efficiency) liquid detergent.

Other problems include:

There are several other reasons your detergent dispenser is on the fritz, for example;

  1. You might be using too much detergent and the washing cycle can’t process the excess.
  2. Your washing machine might not be level, and this could affect the way in which the detergent and softener are pumped through the machine. You can adjust the legs until the machine is level and then the problem should be solved.
  3. The water pressure in your home might be too low, which affects the volume and speed at which water is pumped through the machine. Alternatively, water pressure could be low in just the tap that fills your washer. It might also be blocked to a greater or lesser degree. Use your toothbrush or even a clean mascara wand to clean inside the tap.

There is also quite a serious technical fault involving the water valve or valves. Some washers only have one water valve that feeds the detergent and softener compartments. Other washers have two valves which feed the detergent and softener compartments separately. However many valves your machine has, an open circuit or fault with the power supply could cause problems with your washing machine fabric softener dispenser.

It’s best to call a professional repair person to fix technical problems of this nature.

One final, very important, note: Unplug or switch off the power supply. Cleaning out the washing machine soap dispenser may not involve contact with any electrical components, but it is always better to be safe than sorry.

Posted by Surewise in Appliance Insurance Articles

Washing machine making noises that sound strange! Help!

Why is my washing machine making noises?

It’s not the end of the world if your washing machine is making weird noises, but you do need to check it out so that the problem doesn’t get worse; then it is the end of your washer’s world. Washing machines can make a variety of noises, from banging and rattling to squeaking and clicking. The noises can occur at any point during the wash cycle. In fact, the point at which your washer makes the noise can indicate the nature of the problem. We’re going to look at different washing machine noises, their causes, and possible DIY fixes.

5 Locations where washing machine noises are most likely to occur

The most common problem areas include:

  1. Shock absorbers
  2. Drum bearings
  3. Drive belt
  4. Pulley
  5. Innards

Shock absorbers (Front-loaders)

If your washing machine is making a banging noise you should probably check the shock absorbers. Like the shocks in your car, wear and tear takes a toll, and when this happens they can’t balance the tub/drum in the centre. You’re most likely to hear the washing machine banging on the spin cycle.

It’s possible to replace the shocks yourself, but sometimes the unbalanced drum causes further damage to the machine that only a professional technician can see and fix.

Suspension rods in top-loaders serve the same purpose as shocks in front-loaders. They also become worn and the tub/drum becomes unbalanced during the spin cycle. Sometimes the problem is as simple as replacing a weak spring on the rod, but you might have to replace the whole rod to fix the problem properly.

Drum bearings

According to Peter Tyson (of Peter Tyson Appliances), worn drum bearings are a very common problem which you may first be aware of when your washing machine makes a whirring noise – something like a low rumble. You can verify the problem by spinning the drum by hand to see if it generates noise. However, there are other problems that have the same identifier (for example, a dodgy drive belt), so the best way to pinpoint the cause is to remove the drive belt and then spin the drum.

If this doesn’t generate the noise but your washer is still whirring, you can test the bearings by seeing if you can lift up the drum manually. Check if the washing machine drum feels loose when lifting, and if so then it’s likely the bearings are worn.

If you think that the drum bearings are the problem then the best thing to do is contact a professional repairer. Special tools may be required to access, remove and replace worn bearings. In some cases, access is virtually impossible unless the entire drum is lifted out of the top of the machine. It’s not something you want to tackle yourself.

Drive belt

If your washer has a noisy spin cycle then it’s possible that the rubber on the drive belt is worn. The noise it makes is similar to the rumbling of faulty drum bearings. You can test it by spinning the drum by hand. If you can’t tell which problem is the reason for your washing machine making noise, call a professional repair-person.

Pulley

Washing machine belt

If your washing machine is knocking on the spin cycle then it could be the drive or drum pulley. The pulley is usually made of plastic can easily break due to severe wear and tear. You’ll have to open up your washer to see the drive belt and pulley. Peter Tyson says that it’s necessary to remove the drive belt to test the drum pulley. If it’s loose you may have found the reason your washing machine is making a knocking noise.

Innards

Sometimes the noise doesn’t come from a particular component. Sometimes it comes from items trapped in between components or in a pipe. Said items include coins, buttons, and the underwire from bras. That is right; Peter Tyson says that while having a bra wire stuck in your washer is rare, it can happen. If your washing machine is making a scraping noise, then the underwire is likely to be stuck between the tub and the drum.

You might be able to get it out via the sump hose or the dispenser hose. If you can’t see it or you can see it but you can’t quite reach, then turning the drum slowly can bring it closer to you. If you still can’t get it then you might need to remove panels to expose the innards and improve access.

While the wire isn’t really strong enough to cause serious damage to your washer, it can tear clothes, linen, and towels. It could also travel along the innards to one of the pumps and then block the pump, which can lead to far more serious problems.

Other …

These five examples are obviously not the only noises and problems that could potentially ail your washer. For example, your washing machine could be squeaking, or perhaps your washing machine is rattling.

You might find that your washing machine is making a loud noise during the wash cycle or perhaps during the rinse cycle only. The problem could be in the motor coupler, drum spider, or chassis.

Given the spectrum of problems and the crossover between the noises, a call to a professional technician is highly recommended. Also given the amount of fiddling required to locate a problem, you are more likely to unintentionally cause even more damage. Put your appliance in qualified hands and save yourself the risk of negating your insurance policy.

Posted by Surewise in Appliance Insurance Articles

Washing machine leaking water! Help!

Washing machine leaking water? Here’s what you can you do:

Washing machines leak for several reasons. Often the problem is relatively easy to fix so you can buy replacement parts and repair it yourself. Sometimes, however, the problem is of such a technical nature that you need to call a professional to fix the leak.

Leaks can come from several different areas in the machine, and they can occur during a number of different stages in the wash cycle, including when it is off. We’re going to give you an overview of problems that might result in your washer leaking water, as well as some tips to exercise your DIY skills and get your machine up and running again.

5 of the most common places for your washing machine to be leaking

  1. Hoses
  2. Door seal
  3. Wash cycle
  4. Tub/drum
  5. Drain pump

A deeper look at why your washing machine is leaking water

Hoses

Washing machines have a lot of hoses that serve various purposes, including pumping in water, pumping out water, and drainage. Each hose can leak at various points along its length.

For example: You can get a leaking washing machine hose connection or the washer hose might be leaking at the tap. There may be holes in the hose from sharp objects left in pockets, and then there is regular wear and tear that can cause hoses to split.

It’s easy enough to check the hoses. All you have to do is remove the back panel to gain access and then a visual inspection is usually enough to find any damage. If the washer hose is leaking at the connection then you can cut off the damaged end and reattach it at the connection point. Insulation tape finishes off the repair. Insulation tape is also usually sufficient to repair any cracks, splits, and holes in the hose.

It’s also worth checking the drain hose for any blockages which could cause water to seep (or run) out elsewhere.

Check the connection to the tap. This hose also wears over time, and can gradually work itself loose, going from a slow leak to something more substantial.

Door seal

The door seal on your washing machine works hard, so it’s not unusual for it to tear or split. It also has virtually direct contact with the washing, and the resulting build-up of debris and soap scum can damage the seal or build-up to the extent that the door no longer seals properly.

A damaged door seal can cause water to leak down the front of the washer, as well as down the inside. You can help prevent your washing machine door seal leaking by keeping the door and seal clean. If it’s already leaking then you should check the seal for tears, breaks, and tackiness (from residue build-up). If a good clean doesn’t fix the problem then you’ll have to replace the seal.

Wash cycle

Leaks can happen during the wash cycle. This can lead to water leaking from the detergent drawer. There are two main reasons for this:

  1. The detergent dispenser might not be working properly due to a build-up of excess powder and jellified liquid detergent and fabric softener. The water has nowhere to go except up and out. Giving the dispenser a good clean can solve the problem.
  2. The dispenser hose could be blocked. Again excess detergent or softener that has not dissolved can cause blockages that push the water back the way it came, which is up and out of the detergent drawer.

Tub/Drum

The washing machine tub (top-loader) or drum (front-loader) is a somewhat essential component, so you need to take steps to repair a leak in this area as soon as you notice a puddle underneath your washer.

The problem could be a hole due to uneven wear (the machine is not level or springs and belts are not what they should be). Or, the problem could be related to the tub seal.

Either way, the average layman is out of his depth, so call a professional repair person. If the problem is particularly serious it might make better financial sense to replace the tub or drum rather than repair it.

Drain pump

Problems related to the drain pump will usually manifest during the draining part of the wash cycle. The age and model of your washer will dictate the type of pump used. It could be a belt-driven pump, an electric pump, or a direct-drive pump. The problems could have to do with a fault in the pump itself or with the pump seal, but could also have to do with the inlet and outlet hoses to which it is attached.

You can check the hoses yourself, but if everything appears hunky-dory then the problem is probably more technical and you’re better off calling a professional repair person for help.

Super-important: Always switch off or unplug your washer before you attempt any investigatory or repair work. You are working with an electrical appliance and even though you may only be checking out the door seal, there is still a risk you could electrocute yourself.

Last tips

Laundry room flooded

Before we go, we’ll give you a few quick tips from Peter Tyson Appliances on how to find the source of the water leaks in your washing machine.

  1. Put a newspaper under your washer when you start a wash cycle and remove it regularly to see where water appears. It’s important to check, otherwise the water spreads all over the show and you can’t tell one direction from another.
  2. Look for marks. Look for a white snail’s trail of dried soap marks; this will help pinpoint sudsy-related leaks. Rust indicates long-term leaking so tackle the problem ASAP.
  3. Use your normal load as a leak test. Some leaks only present when the washing cycle is on and there is laundry in the machine. The load changes water levels and the way in which the drum or tub moves, as well as water pressure and so highlights problems that an empty run might miss.

Finally, use your common sense. If you know you’re not great with a screwdriver and wrench, don’t attempt to fix your leaking washing machine on your own. Call the pros and don’t negate your appliance insurance policy.

Posted by Surewise in Appliance Insurance Articles

Washing machine won’t drain! Help!

My washing machine won’t drain properly, what do I do?

If your washing machine won’t drain properly, don’t panic. It is a fairly common problem, especially if you have a habit of leaving tissues and coins in your pockets. Given enough forgetfulness, even a new washer’s drain can get clogged. So what are you to do? We’re going to look at some of the reasons your washing machine won’t drain and provide some DIY solutions for you to try remedy the problem.

You will need some common household tools and the confidence to remove pipes and use plumbing snakes. You also need to be prepared for a wet mess because all that standing water has to go somewhere, and if you’re not careful it could go all over your shoes and floor. A bucket or plastic container and old towels will do nicely while you drain water from the washing machine.

If you’re not that confident or you don’t want to come into contact with smelly water, contact a professional technician to fix the problem.

Let’s get started so you can unclog your washing machine.

Start by switching off the power or unplugging your washer.

  • You need to find your washer’s drain. The instruction manual has diagrams showing you where all the components are, so this shouldn’t be too difficult.

If you can’t find your manual because you put it somewhere safe, the drain pipe is at the back of the washer, along with the hot and cold water pipes. You’ll know the hot and cold water pipes by the colour markings; red for hot and blue for cold.

The washing machine drain pipe also has the water hose attached.

Simple first

  • Before you start messing around with the hose, try this simple solution: Boil the kettle and pour hot (not boiling) water in the drain. The hot water will remove layers of soap scum and allow water to drain properly.

Granted, this won’t help if you use a hot wash as a matter of course. But if you stick to cold washes then this could do the trick.

You can also use commercial cleaner to unclog the washing machine drain pipe. Choose a cleaner that is recommended for washer drains and won’t damage the pipe. Be very careful when you use the cleaner, follow the safety instructions, and store out of reach of pets and children.

  • Check the filter. It could be blocked by fluff, pet hair, tissues, or any other kind of laundry waste. It’s easier enough to clean.

If, after you try the simple steps, you’ve still got a blocked washing machine pipe you need to get the big boy tools.

You need to remove the back of the washer to get to the drain pipe. Then you have to remove the pipe. Bear in mind that any standing water may flow out immediately, so have your bucket or plastic container and towels handy.
(If you’re going to use a commercial cleaner you will have to remove the drain pipe first and then pour the cleaner in.)

At this point you can “snake the drain”.

  • Push the snake into the pipe, corkscrew end first. When you hit something solid, turn the snake so that it snags whatever is blocking the washing machine’s drain pipe. The material gets caught in the snake, clearing the way so you can push the snake further.

Pull out the snake, clean it and push it back into the drain pipe. It’s a good idea to do this until you can go all the way through the pipe to make sure that you’ve removed everything that’s got your washing machine drain clogged.

Then run some hot water through the pipe to rinse it thoroughly and clear any debris that’s barely hanging on.

Reattach the pipe, making sure it’s secure so that your washer doesn’t suddenly develop a leak.

Did you know that the lid or door of your washing machine has to be properly closed for it to drain? 

  • There is a small switch (the lid switch) that senses when the door is shut so the machine can complete the chosen cycle. If the switch isn’t in the correct position or it’s broken the machine won’t drain.

Find the switch (it’ll be near the door or lid) and press it until you hear a click. If it doesn’t click, it’s broken and probably needs to be replaced.

If it’s still not draining, check the washing machine pump. 

  • Once again, your owner’s manual will show you where the pump is and what kind of pump will serve as a replacement.

You can remove and replace the pump as a matter of course, which is a good idea if you don’t want to mess around too much with the inner workings but you don’t want to call out a technician either.

If you don’t want the expense of a new pump but you also don’t want to make things worse with amateur tinkering, call a professional technician. It might be that all he has to do is unblock the washing machine pipe; or he might have to replace the belt or repair the impeller. Whatever the problem, your insurance will pay for a professional to do the work.

Once the problem has been fixed, it’s a good idea to get into the habit of keeping your washer clean; this means wiping the drum, wiping the rubber seal, cleaning the filter, and using a descaler on a semi-regular basis (3 – 4 times a year). You should also always check pockets before you put clothes in the machine.

Posted by Surewise in Appliance Insurance Articles

Washing machine won’t spin! Help!

My Washing Machine Won’t Spin, what can I do?

If your washing machine won’t spin take heart, you are far from alone. This is actually quite a common problem and the cause can be very simple and easy to fix, or complicated and require good DIY skills. We’re going to look at various reasons your washing machine won’t spin, and give you some solutions to resolve the problem.

Simple cause, simple fix

If the problem is intermittent it could be as simple as an unbalanced load. Sometimes clothes or towels or blankets can bunch to one side and the weight can result in your washing machine not spinning properly. Often, an overloaded washing won’t spin either.

So what’s the trick? How do you ensure that you pack the perfect load?

According to eSpares, you should wash heavy items together, and put them in the washer individually so that they don’t get tangled. Wash light items together and resist the temptation to stuff in a bath sheet or blanket as this will, once again, unbalance the load.

Simple cause, not so simple fix

Bear in mind that it doesn’t take several items to constitute a heavy load. Cramming your thick winter duvet in the machine may not unbalance the drum or tub, but the substantial weight can damage important components, including bearings and springs. If this is the reason the spin cycle is not working properly you may have to replace the damaged parts. Your owner’s manual will show you where to find them.

Not so simple reasons your washing machine won’t spin

  1. A problem specific to top-loaders is wear and tear on the direct drive motor coupling. This could affect the transmission and clutch (if there is one) and will result in your washing machine draining but not spinning.

It’s not an easy fix. It involves accessing your machine’s innards and potentially removing the motor and pump before you can reach and remove the direct drive motor coupling. You need to be able to remove it without damaging nearby components and install the replacement drive without damaging other parts.

Unless you really know what you’re doing, you should call a professional technician to replace the part.

  1. A damaged drive belt could be the reason your top-load or front-load washing machine won’t spin. The most common problems are overheating and, of course, normal wear and tear. Sometimes there are additional problems, including a conked out idler pulley, motor glide, or transmission pulley. These parts ensure the drum or tub moves freely.

Your owner’s manual will show you where to find the drive belt, which is easy enough, but removing it is another matter. You need to disconnect the clamps that connect the belt to the drive motor (check your owner’s manual). If you’re confident with this level of DIY then you might also be confident enough to replace the belt with a new one.

If DIY is not your thing, call a professional technician.

  1. Our final example of a problem that could lead to your washer not spinning clothes dry is a malfunctioning motor, most commonly caused by worn carbon brushes. One of the signs of this problem is your washer draining but not spinning. Another sign is a spluttering noise.

You’ll have to remove the motor to fully inspect it and find the source of the problem. Motors can be complex parts, so you should only tackle replacing the motor if you are completely confident in your DIY skills. Otherwise, you guessed it, call a professional technician.

Is the reason your washing machine won’t spin really what you think it is?

There are some in the industry who disagree with much of the information supplied above. They call them ‘washing machine myths’ and they are keen to dispel them. Let’s take a quick look.

  1. Damaged belts. Modern belts in modern washing machines aren’t prone to stretching or even a significant amount of wear and tear.
  2. Carbon brushes. Worn brushes are a problem but only in machines that have seen a lot of action over several years.
  3. Faulty timer. Only in the rarest of circumstances does a broken timer ensure your washer stops at the rinse cycle.

Some genuine problems, according to the article, include:

A blocked washing machine filter: Clean the filter and check the drain pump for blockages. Carry out this task at least once a month.

Spin out of balance detection: Modern washers have an electronic system that can tell when the load has caused the drum or tub to spin out of whack. The system either stops the spin cycle in its tracks or slows it down to prevent damage. The load can be either too heavy or too light, as is the case if you are just washing one item (that is not your winter duvet).

A genuinely faulty washer: These faults are difficult to detect and should best be checked and repaired by a professional technician.

Remember: It is vitally important that you unplug your washer if you are going to undertake any repairs by yourself. Safety first.

Posted by Surewise in Appliance Insurance Articles

Washing machine smell? Reason’s why, and what you can do to stop it

Sometimes our washing machines smell musty or damp, and sometimes they make our clothes smell bad too. Mold and Bacteria can cause unpleasant smells, even if the washing machine is brand new. In this article, we’re going to look at the possible reasons behind a smelly washing machine and give you tips to create your own laundry smell removers to eliminate odours and reclaim crisp, clean freshness.

Does your washing machine smell?

Freshly laundered clothes should smell fantastic, but what if your freshly cleaned laundry doesn’t smell fresh at all? What if your clothes come out of the washing machine smelling damp, mouldy, and musty? If your washing machine smells bad, you need to take quick action so you aren’t stuck with smelly clothes.

Unfortunately for front-load washer owners their machines are more prone to odour problems than top-loaders.

Fortunately, it’s quite easy to get rid of the smell in your washing machine (wherever you load your laundry).

The best way to remove the smell from your washing machine is to take these simple steps:

  1. The first step is to take out your washing as soon as the machine is done. This can be easier said than done if the wash finishes while you’re in the middle of cooking, bathing kids, writing an important email, or chatting to your mom on the phone. Many of us also get our laundry going when we have to be out for a while and the machine finishes before we get back. This is not a crisis if it happens occasionally but you should try to get into the habit of responding to the end chimes as soon as you hear them.
  2. The second step is to simply leave the washer door and detergent drawers open after a wash. The opportunity to dry (and dry properly) in fresh air eliminates the growth of bacteria and mould.
  3. The third step is to use the correct amount of detergent. Too much detergent can cause excessive sudsing and lead to a build-up of soap scum. If the scum is left too long it starts to grow mould and you’ll still have a mildew smell in your washing machine.

So far you haven’t had to go to any special trouble to stop your washing machine from smelling awful. Sometimes, however, the stink has set in and you need to take more serious action to freshen your washer.

Action plans for clean, stink-free laundry

Do a service wash, which is just a wash cycle with a cleaning agent and no clothes. Service washes should be done monthly to keep your machine mould, bacteria, and odour free.

Cleaning agents you can use include bleach, white vinegar, and baking soda.

There is a generic ‘recipe’ you can follow.

  • Roughly one cup of your chosen cleaning agent, which you put in the drum. (Add a cup of water to ¼ cup of baking soda to create a safe homemade remedy for your smelly washing machine.)
  • Roughly ½ a cup of bleach or vinegar, which you put in the detergent drawer.
  • Run a normal cycle with an empty drum and hot water.

You may need to repeat for particularly stubborn smells.

Sometimes your washer smells even after you’ve taken these steps.

If your clothes still smell after washing you need to look at the innards.

The rubber seal around the door could be host to a growing crop of mould. You can clean it with a white vinegar or diluted bleach solution. Use a clean cloth or sponge to wipe the seal and double-check to make sure you haven’t missed any spots.

Get into the habit of wiping the drum, inner door, and rubber seal with the cleaning solution after each wash. If that is a schlep, aim for a wipe-down at least once every two weeks.

The detergent drawers may hold onto their soap scum or slime even after you’ve run bleach or white vinegar through the system. In this case, get your cleaning solution and an old (clean) toothbrush. The toothbrush has a long reach and its soft bristles can remove soap scum or slime more effectively than you poking a sponge around.

Find and clean the drain pump. Let’s be honest, we’re more likely to remember to clean the lint catcher in top loaders than to check the drain pump in front loaders. This is unfortunate because sometimes it gets clogged and the water can’t drain properly. The bad odour from your washing machine comes from the stagnant water that remains. The manual will tell you where to find the drain pump and how to drain it and clean it properly. Make cleaning the drain pump part of your monthly cleaning routine.

If, after all of this, your washing machine is still making your clothes smell after washing, call a plumber. The problem could serious and you could make it far worse by meddling with different parts and components. You will also invalidate the warranty and your appliance insurance policy.

Posted by Surewise in Appliance Insurance Articles
Washing Machine shaking and moving? How to stop it

Washing Machine shaking and moving? How to stop it

Why is my Washing Machine Shaking and Moving?

One doesn’t often see one’s washing machine shaking & moving around, but it’s unsettling when one does. It’s especially unsettling because it’s usually accompanied by a cacophony of rattling. There are several possible reasons you washing machine vibrates across the floor. We’re going to look at them one-by-one and provide some solutions to stop your washing machine moving.

Note: While it’s more common for front-loading washing machines to have vibration problems, top-loaders may also present some common issues.

Note: For safety’s sake, always unplug your washing machine or switch off the power before you investigate and tackle any problems.

5 Reasons behind washing machine vibration and shaking.

1) The washing machine’s legs aren’t level.

Probably the most common cause for washing machines shifting position is legs that aren’t level. This is easy to fix as you can screw and unscrew the legs to adjust their height. If you’re a stickler for perfection then you can use a level to make sure you get it exactly even.

While you’re working on the legs, take a look at the rubber or plastic cushioning the bottom of the legs. If these are broken the washer may still take a walk. These rubber and plastic caps are readily available from hardware stores and are easy to replace.

2) The floor is not level.

It’s also possible that the floor is not even. You can test this with a level. If it’s uneven you can try adjusting the legs. If possible, you could also move the washer, although this is often not practical.

3) The washing machine is loverloaded or the load is unbalanced.

It’s tempting to stuff as much washing as possible in your machine to save time and water. Unfortunately, overloading can ensure the washing machine shakes on the spin cycle. Keep the loads reasonable – stick to the recommended weight – and the shaking should stop.

Sometimes large and heavy items of laundry can unbalance the machine. Blankets and sheets, for example, can cling to one side to the barrel or tub and unbalance the spin cycle. Try not to wash a lot of bed linen together. In fact, you can stick your trainers or running shoes in with some sheets, towels, or blankets to aid balance (and kill two birds with one stone).

4) The shock absorbers are damaged.

Front-load washers have shock absorbers to keep everything in check, especially during the spin cycle. If you’re confident in your DIY skills, you can check the shock absorbers and replace them yourself.

You’ll have to remove either the front or back panel to reach them. While you’ve got the washer open you can also look for other signs of wear and tear and possible leaks. It’s advisable to replace both shock absorbers at the same time to stop the washing machine shaking.

5) The suspension springs are damaged.

Top-loaders have suspension springs that suspend and stabilise the tub. If these are damaged it could lead to your washing machine moving forward. Again, if you are confident of your DIY skills you can remove the top or front panel to reach the springs. You have to be very careful due to the inherent tension in the springs. It’s advisable to replace all the suspension springs at the same time.

Check Other Components

Other components that could be damaged to the extent that they cause washers to vibrate during the spin cycle include:

  • Snubber ring, damper pad, and tub wear pads
  • Tub dampening straps

You can inspect and replace all of these yourself, if you so choose. However, it can be quite tricky to find and remove all of these components unless you are familiar with washing machines’ inner workings.

It may be safer on all fronts to call a specialist to fix the problem for you and ensure that your old or new washing machine stops shaking.

Also, opening your washer yourself can affect your insurance claim. If you want to recoup your costs, call a professional service provider.

Posted by Surewise in Appliance Insurance Articles
Load more