There’s Mould in my Tumble Dryer
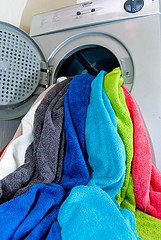
Mould spores are nasty, and can go unnoticed for quite some time, especially if they’re hidden in hard to see spots like your tumble dryer. Mould can grow just about anywhere and thrives in places with even slight traces of moisture. Over time, the mould will cause your dryer to have an odour problem; it can also penetrate and even stain your newly-washed laundry.
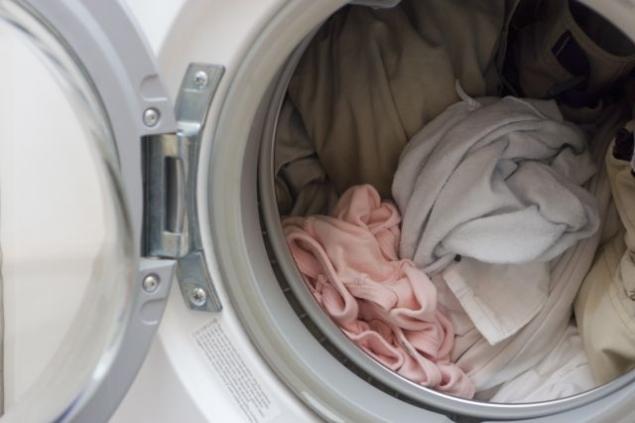
Your tumble dryer could retain damp if you overload, or sometimes leave still-damp clothes in it; this creates the perfect conditions for mould to multiply.
You can minimise the chances of mould growing in your tumble dryer by using the hottest dryer settings that your laundry allows. It’s a good idea to dry clothes that require a low setting first and finish with items that can take higher settings, for example, towels and jeans, to ensure that your dryer ends on a dry note.
Types of Mould
There are five common types of mould that can be found in most households, but only one is likely to grow in your tumble dryer: Cladosporium Herbarum. It is most often found on dead plants and soil, fridges, window frames, straw houses with poor ventilation and low damp areas.
The best way to prevent mould from growing is to ensure your home is well ventilated in general, and that your laundry area is particularly well ventilated. Regularly check for damp spots, keep the area clean and make sure that your washer and tumble dryer are not pressed right up against the wall or against one another. If you have to dry clothes indoors in your laundry area, make sure that you have a good breeze blowing through so that the air doesn’t get damp. Also, make sure that all windows and doors to the laundry area are closed in wet weather and repair any leaks as soon as possible. Make sure your tumble dryer is vented outside when in use, or use a condenser-dryer.
Need Home Appliance Insurance? – Cover for all your home appliances
Click Here for a quote!
Eek! There’s Mould in my Tumble Dryer!
With our busy schedules we often have to do about 10 things simultaneously, like boiling the kettle for a cup of tea, which will also be used supper’s rice, while shoving the laundry into the dryer. Under these conditions, who has the presence of mind to check for things like mould growth in the tumble dryer?
Get rid of mould
If you do have mould, these tips should help restore the laundry-fresh smell to your clothes and linens. First, unplug the tumble dryer, and then:
- Wipe clean the insides of the tumble dryer with antiseptic wipes.
- Dilute a fabric softener and dip a clean sponge in the solution to soak up the perfume. Squeeze out the liquid and put the wet sponge along with the clothes in the tumbler. This should remove the smell in the dryer.
- Put some bicarbonate in an old sock and knot the sock at the top. Put this in your condenser dryer for a ten-minute tumble. The smell should be completely gone.
- Add a fragrance sheet to your dryer for no more smelly clothes.This next tip needs a bit of patience.
- If are using a condenser dryer, let the clothes dry for 30 minutes. Then remove the clothes and shake them out in the air one by one. Put the clothes back in the dryer for another 30 minutes. Not only will this make the smell go away, but your clothes will dry faster.
- Make a thin paste of baking soda and soak a sponge in it. Clean the inside of the dryer with the sponge. After a thorough wipe with the sponge, clean the dryer with a soft cloth. Run a normal cycle in the dryer when it is empty for about 10 minutes.
If the mould proves to be stubborn you could try this way to get rid of the problem:
 Bleach is a really good way to get rid of mould. You’ll need two clean cloths, a litre of warm water, ¼ cup of bleach, small spray bottle filled with a solution of water and ten or so drops of vanilla essence / eucalyptus oil or undiluted plain vinegar, and few clean towels. Be sure to use the hottest dryer setting and not the delicate cycle or the permanent press cycle when you do the last step of the process
- Add the bleach to the warm water.
- Wet your cloth completely in the water-bleach solution and then wring out so that it’s wet but not dripping.
- Wipe the dryer inside and out, making sure you do the door too. A thin layer of the solution will remain on the surfaces, which will kill all mould.
- Leave to dry completely and once dry take a clean cloth rinsed in clean water and wipe down the dryer again. Wiping the tumble dryer clean is important because if you leave the bleach solution as it, you may well find that your next load of laundry comes out the machine discoloured.
- Spray the clean towels with the vanilla-water or eucalyptus-water solution or vinegar and then put into the dryer. This will remove the smell of bleach from the drum. Note, if you use vinegar your next load might remind you of fish and chips. Vanilla and eucalyptus, on the other hand, will absorb the bleach smell and leave your tumble dryer smelling quite pleasant. Remember to wash the towels once you’re done.
- Make sure you clean the condenser dryer regularly too and leave the door ajar after use.
If the smell persists, call an appliance service professional.
You can help prevent mould in the future by regularly checking for and cleaning out lint as it collects and retains moisture. Just remove the lint screen and wipe it with a dry cloth to get rid of the residual lint. To make sure you get all the lint out, use your vacuum hose attachment which will loosen clogged or backed up damp lint. Make sure you’ve removed all the lint before replacing the screen. It’s a good idea to clean the lint screen after every drying cycle to make sure you don’t get lint build-up.

 Cleaning the oven is undoubtedly one of the most difficult aspects of keeping the kitchen looking pristine. Often it takes a great deal of physical strength to get the grease and grime off an extensively used oven. Worse still are the harmful smells of industrial-strength oven cleaners available in the market. Popular oven cleaners have highly caustic chemical such as butane and sodium hydroxide that can be hazardous to your family’s health.
 The hob is often a place you prepare food every day, so it’s an essential place in your home to keep clean. The best way to ensure that the hob & cooker area is hygienic is to wipe after each use when any food residue or stains are still fresh.