Appliance Insurance Articles

Articles and Blog style posts on Appliances & Appliance Insurance

Super Quick Fixes if Your Sky Digital Box Has No Signal

Quick Fixes if Your Sky Digital Box Has No Signal

You’ve just sat down after a long day, ready to stick on one of your favourite programmes to kick back and relax…only to find that your Sky Box has no signal.

There’s nothing more frustrating!

Unfortunately, if your sky box has no signal due to bad weather, there’s not a whole lot you can do. However, there are some DIY quick fixes you can try to fix your Sky Box signal.

Sky has No Signal? Try this first…

First, check that no cables have come loose or disconnected at the back of your box. This is one of the most common problems you’ll encounter when your sky box has no signal, but luckily it’s the quickest fix!

You can also make sure there are no objects that you may have inadvertently placed on a cable.

If the cables are all good, try the following to troubleshoot the problem:

Rest Transponder in Off Mode

Press and hold the Standby button on your Sky remote until the red light indicating ‘Off” comes on, and wait five seconds before pressing the Sky button on your remote.

The light will change to amber indicating the digital box is in the standby mode.

Wait another five or so minutes before going to the next step which is to press the Sky button again. The box defaults to the Welcome Channel (channel 998) which confirms the reset and connection status.

Need Home Appliance Insurance? – Cover for your Sky box & other home appliances Click Here for a quote!

Check the Dish Input Connection

This step will interrupt any recordings that are currently in process. However, saved settings and recorded programmes are safe.

First, switch off your Sky Box and all peripheral devices at the mains and wait until the power light on your digital box has gone out before moving on to the next step.

Unscrew the dish input cables and check for two things:

  • Damage to the cables. Call an engineer if the cables are dislodged from the metal housing or the nozzle is bent or broken.
  • The two separate cable parts must not be touching. Keep the core and the braiding (copper or aluminium sheath) separate at all times. If there’s even an iota of contact, you’ll lose signal.

If the cables are ok, gently push them back into their sockets and tighten the screws.


Check Signal Strength

Checking signal strength is the same of HD and older model Sky Boxes. Press the Services button on your remote and then the 4 & 6 buttons. You’ll get the Signal Test Menu.

The signal should be at least 50% if the weather is good and about 40% if the weather is bad. If you’ve got no signal strength try the following steps:

  1. Switch the Sky + HD box and TV to standby
  2. Wait a few minutes and then switch off all connected items and unplug them from the mains
  3. Disconnect and then reconnect the cables from the satellite to Dish Input 1 and Dish Input 2 at the back of your box.
  4. Take care not to bend the copper wire in the middle of the satellite cable and make sure you secure the connection at the back of the skybox (remember, if these wires are damaged or broken you’ll need to call a Sky engineer to sort them out).
  5. Plug in and switch on all items and check signal strength again

Error message

If you get a message that says, No Satellite Signal is Being Received – Error 25 or Error 29 you can try resetting your digital box.

Switch off the mains and unplug the Sky Box and HD or Standard recorder from the mains supply.

Wait about half a minute and reconnect all the items you’ve unplugged and switch on the mains. Check to see whether you’ve got a signal. If you still don’t have a signal the fault might be in the new Sky mini dish LNB cables, standard LNB cables or coaxial cable.

Check LNB Cables

Check the LNB cables by checking the F-Connectors for tightness; they should be tight, but not too tight. Look for moisture which is harmful to the feeder or LNB. The LNB cable connections must be adequately water-proofed, failure. Adequately water-proofed cable connections will have self-amalgamating tape, other types of tape aren’t sufficient for keeping moisture out of the cable box and LNB over the long term, and will inevitably disrupt signal from the satellite dish.

Try swapping the LNB Cables by unscrewing the cable connectors found on the back of the box, swap them around to check if one of them is faulty.

If this gives you a picture then check the F-Connector on the faulty cable at both the dish and box for a short triggered by the coaxial cable outer braiding touching the cable’s copper centre.

Dish alignment

It’s easy for a dish to be knocked out of alignment by anything from weather to somebody putting a ladder up to clean high windows or check the gutter. If the dish has been knocked out of position you can try to realign it yourself or call a technician to do it for you.

While you’re up there, you can also check the general condition of your dish. It may be badly rusted or corroded, in which case a replacement is necessary.

For a video tutorial on how to cure this problem, please see here;

If you still have problems and have a TV capable of Wi-Fi – why not try NOW TV?

NOW TV is available on demand with single day or monthly passes and can make accessing SKY’s services much easier and cheaper.

Still No Signal from your Skybox?

The problem may lie with the Sky Box itself! Try swapping your box with a neighbour or friend and if the borrowed Sky Box works just fine then you know that yours is faulty and you’ll have to give the Sky helpline a call.

Quick Tips If Your Sky BoX Won’t Turn On

If your Sky digital box won’t turn on or becomes unresponsive, here are some 7 troubleshooting tips that can rectify the fault:

  1. Reboot the Sky Box

A reboot should be your first course of action when attempting to solve technical issues with any device. In the case of the Sky Box, you’ll need to switch off the plugs for the box and all connected devices (either deactivate them at the mains or unplug them). Make sure the power light for the Sky Box is off and that all connected devices are also powered off. Then switch them all back on. Wait about 3 minutes before pressing Sky on your Sky remote. A green light display on the front indicates that your Sky box problems have been resolved.

  1. Power reset

If your Sky digital box has become unresponsive to the remote control commands, turn off the mains of the digital box and the television. Ensure there are no lights in the digital box panel before you switch on the mains again.  As you do so, a red light will appear indicating that the box is in standby mode. Let the box remain in the standby mode for about 5 minutes and then switch on the television and press Sky on the remote. The digital box light should turn green and your Sky welcome channel should appear.

  1. Remote control

Sometimes the Sky Box won’t turn on because the batteries in your Sky remote are getting too weak to work. Replacing the batteries may help resolve the problem. Alternatively, if you have accidentally pressed the TV button on the remote, the Sky Box will become unresponsive.  Press the Sky button on the remote to get the box to respond.

  1. Software update

The digital Sky Box may also become unresponsive if it is overdue for a software update. To initiate the software download, unplug the digital box and press the ‘Backup’ button located at the front panel of the digital box. Without releasing the backup button, plug in the digital box. Keep pressing the button until the lights on the front panel of the digital box flash. You can let go of the button but will need to wait for approximately 10 minutes while the software downloads. Once the software has been installed, your digital box should operate perfectly.

  1. LNB settings

LNB settings determine whether or not your Sky Box can receive satellite signals, so if the box is not responding, it could be due to an LNB fault. Check that you have the right LNB settings. You can access your LNB settings by going to your menu system (press Select on the remote) and choosing the Settings option (it’s the option to the far left, with a spanner next to it). Choose the ‘Advanced Settings’ option; you will be asked for a PIN number (0000 for the older decoders, the first four digits of your account number for the newer models. You can call Sky for help if you don’t remember it). After entering your Pin number, select LNB setup.

  1. Connectors

Check that the connectors at the back of the Sky Box are tightly screwed on. Check that there are no stray wires around the cable connectors.

  1. Panel reset

If the above steps do not work, try resetting the box. (Important: This will delete all recordings in your hard drive). To reset the digital box follow these steps:

  • Turn off the mains
  • Press the left and right arrow buttons either side of the select button on your Sky remote
  • Keeping the buttons pressed, turn on the box again
  • Continue pressing the buttons and within 60 seconds the blue/green circle lights on the box will light up
  • Release the left and right arrow buttons and press the select button twice
  • The blue/green circle lights will move anti-clockwise and the record/ play lights will start flashing on/off
  • When the lights go off, the box is rebooted
  • You will only see the red light on the box
  • Wait for 3 minutes before switching on the box using the remote to see if the problem has been resolved.
Need Home Appliance Insurance? – Why Surewise.com Benefits Reviews & FeedbackGet a Quote


Posted by Surewise in Appliance Insurance Articles

8 Essential Non-Electric Appliances for Your Kitchen

8 Essential Non-Electric Appliances for the Kitchen

Do you want to try off-grid living, but are afraid of the lifestyle extreme change? Why not experiment with some non-electric appliances? Simply switching to non-electric appliances in your kitchen can put some extra money in your pocket as they shave vital pounds and pence of your utility bills.

The number of non-electric appliances available will suprise you

Our top pick

A pasta maker is essential if you love pasta. And, since homemade pasta is one of the easiest things to cook, it’s a good place to start if you’re contemplating off-grid living. Remember: The quality of the pasta depends on the quality of the ingredients, and your kneading technique. If you don’t knead correctly, your pasta will be sticky.

Most pasta makers are adjustable, so you can make perfect lasagne, cannelloni, ravioli, ribbon noodles, and fettuccine, etc. In no time at all you’ll be making pasta good enough to impress Marcus Wareing on MasterChef: The Professionals.

Non-electric appliances you might already own

Many of our existing kitchen appliances don’t need electricity. There are also several affordable options available, so you can really embrace retro living.

  1. Coffee percolator. They make delicious coffee and are convenient for camping trips. Percolators are easy to use, simply add water, ground coffee beans and a filter and leave it on a heat source (a fire for non-electric living) for 5 – 10 minutes, depending on how strong you like your coffee.
  2. French press: This is another coffee maker that is as easy to use as a percolator. Simply boil water on a heat source (a gas stove or open fire), and pour over coffee grounds. Let it steep for around five minutes and then push the plunger down to get all the grounds to the bottom. Pour and serve.
  3. Manual mixer. Twist the handle and watch the beaters whirl. It’s great for beating eggs, whipping cream and making batter.
  4. Hand flour mill. Got gluten issues? Then use one of these babies to turn oats, rice or chickpeas into flour.
  5. Dough maker. Of course you can knead dough by hand, but why not try a non-electric bread maker to speed things up a bit. Simply add the ingredients, crank the mixture and enjoy perfectly kneaded dough.
  6. Food strainer. Many people have a food strainer occupying the back of the cupboard. It’s great for making your own sauces, juices and jams. All you need do is cut up fruit, drop them in and start turning. You don’t need to peel or core the fruit, as the strainer will do all the separating for you.
  7. Manual food processor. A twist of the handle turns multiple blades rapidly, producing the same great results as an electric food processor. A number of blades allow you to cut, dice and blend as desired.
  8. Zeer clay pot fridge. You’re unlikely to have one of these lying around, but they’re great way to keeping food cool. You put one terracotta pot inside another and fill the space between with wet sand. As the water evaporates, it pulls heat from the pot inside and makes it cooler than the air outside.

The bottom line

Let’s not muck about, eschewing electricity for manually-operated appliances does feel like a bit of a step backward. Technology advances for a reason – to make life easier. Using elbow grease is not easier than flipping a switch or pressing a button. Depending on how passionate you are about your cooking, however, it can be more satisfying when you know the meal produced is the result of authentic hard work.

If you’re passionate about saving energy and going green, non-electric appliances also hold certain appeal. And, if you’re in the position where every penny saved is a penny earned, you can’t shrug off the money-saving benefits of putting electricity on the back burner.

Posted by Surewise in Appliance Insurance Articles

18 of the Best Selling Home & Kitchen Appliances

18 of the Best Selling Home & Kitchen Appliances

Every now and then it’s nice to check in to see what other people are buying, either to see if you’re missing out on something wonderful and life-changing or because you’re in the market for new kitchen appliances and need some advice or ideas on what makes and models are likely to meet your needs.

We’re going to look at some of the best selling home and kitchen appliances on Amazon, so not only can you see what other people are buying, but you can also easily click for your own purchases.

In no particular order, 18 of the top selling home and kitchen appliances include:

  1. ProBreeze® Garment Steamer

The steamer heats up so quickly that you can go from a cold start to steaming in less than one minute. Its nozzle ensures steam is directed to the right spot and is distributed evenly so you can get rid of wrinkles without creating more. It’s portable and works on a range of fabrics, including cotton, wool, linen, polyester, nylon, sequins, beads, embroidery, and upholstery. It has an auto safety shut-off.

Expect to pay between £40 and £60.

  1. Breville VBL062 Blend Active Personal Blender

You don’t have to wonder about what to do with leftovers with this personal blender as it makes just enough to fit in the sports bottle provided. Crush ice and mix smoothies, juices and shakes to your heart’s content and don’t worry about the washing up – blades and blending bottles are dishwasher safe.

Expect to pay between £20 and £30.

  1. Q-Connect 760mm, 30” Tower Fan

‘Tis the season for cooling down; of course fans are top sellers. This model rotates or can be fixed in a direction so you can choose your airflow. It’s great for large open spaces and comes with adjustable settings.

Expect to pay between £30 and £60.

  1. Numatic HVR200-12 Henry Vacuum Cleaner

With 9l capacity and reduced sound, this is a great vacuum cleaner that is worth its weight in gold. It has an A energy rating, extra suction, can be used on different flooring surfaces, and is easy to push around.

Expect to pay between £100 and £170.

  1. Morphy Richards 42244 Jet Steam Generator Iron

It’s expensive but boy is it worth it with a diamond soleplate that makes it durable and also makes it easy to glide over clothing without ironing in creases – great for the ironing-challenged. It also comes with removable anti-scale cartridges.

Expect to pay between £50 (great special offer) and £200.

  1. Russell Hobbs 21370 Steamglide Professional Iron

Once again the ironing-challenged can rejoice as this iron is designed for dummies. It’s got a soft-touch comfort grip (no hand cramps) and a ceramic soleplate that glides beautifully and which is also durable, non-stick and efficient thanks to even heat distribution. Best of all, it’s self-cleaning.

Expect to pay between £24 and £60.

  1. Russell Hobbs 20070 Cambridge Kettle

Elegant stainless-steel, the Cambridge Kettle allows you to boil water for one cup in 45 seconds. Its total capacity is 1.7l and it has a concealed heating element and removable filter that is easy to wash.

Expect to pay between £16 and £20.

  1. Amir® Digital Kitchen Scale

Elegant in black, with an LCD display and slim design, this scale has precision sensors so you can get exactly the weight you want, which is especially important if you’re a keen baker. It’s easy to clean and has a ‘zero’ function, so you can bring the scale back to zero even when the bowl is full of flour, butter and sugar.

Expect to pay between £10 and £30.

  1. VonHaus 2-in1 Upright Stick & Handheld Vacuum Cleaner

Offering the ultimate in convenience, the VonHaus comes with HEPA and sponge filtration and a crevice tool, so you can get into virtually any nook and cranny. It has a mid-level, 1.3l, but it’s easy to clean and thanks to the filtration is hygienic.

Expect to pay between £18 and £35.

  1. Aerobie AeroPress Coffee Maker

Coffee in one minute, how great is that? And it’s not instant coffee either; instead you can savour creamy, rich-flavoured coffee without any trace of a bitter aftertaste. The AeroPress uses a unique brewing system that delivers perfect cup after cup of coffee. It’s also no mess no fuss.

Expect to pay between £23 and £28.

  1. George Foreman 20840 5-Portion Family Grill

George Foreman is at it again, cooking tasty, low-fat food quickly on a 5-portion grill that allows you to cook pizzas, open sandwiches, paninis, and thick cuts of meat (or tofu steaks). The removable plates are dishwasher safe. It’s one of the best kitchen appliances on the market.

Expect to pay between £40 and £65.

  1. Breville VST041 Deep Fill Sandwich Toaster

Breville eoffers the deepest sandwiches yet, to satisfy even the most Homer-like of appetites. It has removable plates that are dishwasher safe and works well with all sized slices of bread. It’s compact enough to store upright in a tight corner of your kitchen cabinets.

Expect to pay between £25 and £37.

  1. Quest Non-Stick Cool Touch Dual Omelette Maker

Who doesn’t love a good omelette? But who likes the time and effort it takes to make one? Now you can make 2 omelettes at a time in next-to-no-time, and the easy-to-remove, easy-to-clean non-stick plates won’t even be a pain in the wash.

Expect to pay between £12 and £26.

  1. Instant Pot Duo 7-in-1 Electric Pressure Cooker

Instant Pot claims to speed up cooking by 2 – 6 times, while using 70% less energy, so already it’s a winner. The fact that it boasts so many functions (pressure cooker, slow cooker, rice cooker, sauté/browning, yoghurt maker, steamer, and warmer) should earn it a gold medal at the cooking Olympics. It has 14 built-in programmes, temperature settings and 10 safety mechanisms.

Expect to pay between £95 and £170.

  1. Russell Hobbs RHM2362S Digital Microwave

The 23l microwave comes with a dishwasher safe turntable, pre-programmed auto-cook menus for one-touch cooking, a child safety lock and, of course, elegant good looks.

Expect to pay around £65.

  1. Russell Hobbs 21140 Three-Tier Food Steamer

The steamer has a total capacity of 9l and heats up in less than 40 seconds. In addition to three baskets, you also get a 1l rice bowl and egg holders.

Expect to pay between £25 and £50.

  1. Breville 2-Slive Toaster

It may be designed with Warburtons bread in mind, but it perfectly capable of producing perfect toast using other brands. Features include look-and-lift so you can check on your toast without stopping the programme, and high-lift, so you don’t have to dig out the toast with an inappropriate utensil. It can also toast crumpets and bagels and can be used to defrost bread for a simple sandwich.

Expect to pay between £23 and £35.

  1. Philips HD9220/20 Oil-Free Airfryer

It’s not cheap, but can you really put a price on your health, especially if you are plagued by cravings for all the bad stuff, like chips and deep fried fish. It uses up to 80% less fat than a conventional fryer, thanks to its Rapid Air Technology that circulates hot air to cook and crisp up food. It comes with temperature control and an integrated timer with auto-off.

Expect to pay between £84 (super great deal) and £200.

Take your pick of the above kitchen appliances and enjoy a chic, elegant and efficient cooking, coffee-making and baking.

Need Home Appliance Insurance? – Cover for all your home appliances Click Here for a quote!
Posted by Surewise in Appliance Insurance Articles

We Uncover Ikea Delivery Charges & Process for You

We Uncover Ikea Delivery Charges & Process for You

Who doesn’t love at least one Ikea product? The range of products is incredible and they’re inventive and good looking to boot.  However not everyone relishes the thought of a trip when the stores are so busy, so there was some delight when the company announced a unique Ikea delivery service.

There have been some complaints recently, however, over the franchise’s delivery costs, which some claim are unexpectedly high. So we’re going to take a look at Ikea’s delivery process and the costs of its delivery options.

Ikea delivery services

Ikea offers 3 delivery options:

  • In-store delivery

If you’re lucky you can get same-day delivery, but next-day delivery may be more realistic as your order is delivered to a store in to closest to your delivery area. Individual stores have slightly different delivery services, so check with the branches concerned.

  • Parcel delivery

Parcel delivery is an online delivery option that caters to items up to 25kg. You can have several items delivered at once, provided the total weight doesn’t exceed 100kg. Note: Some products may weigh less then 25kg but aren’t suitable for parcel delivery, like mirrors or items longer than 1.5m, and they will be delivered by truck.

Ikea uses Parcelforce to handle parcel deliveries. One of the benefits is that you don’t need to be home when items are delivered, at least the first time. You can rearrange delivery so that the time suits you.

Parcel delivery costs £7.50.

  • Truck delivery

Truck delivery caters to items over 25kg and more than 1.5m long. Parcelforce also handles truck deliveries and will deliver items during the week – Monday to Friday, between 9am and 6pm. Certain days are reserved for certain areas, so delivery depends on where you live.

Truck delivery costs start at £35; exact costs depend on the area in which you live (postcode).

Ikea delivery process

Ikea will email a delivery notification within 72 hours of the order. This is the best time to change the delivery date if necessary. Expect delivery within 14 days, except if you have a made-to-order product, in which case delivery may take longer.

According to Ikea, it’s your responsibility to inform the company of any delivery restrictions in your area; for example, height, width and weight restrictions for vehicles, parking restrictions, and time restrictions. You’re responsible for ensuring items fit through doorways, passages and up staircases. Note: Delivery staff are not allowed to remove doors or windows to allow access and don’t assemble items.

If you are expecting a parcel delivery, you can follow its progress by checking in with Idea’s order tracking service. The tracking number is added 24 – 48 hours prior to delivery.

Truck delivery specifics

Ikea will send a text notification 48 hours prior to delivery with an estimated 60-minute delivery window. One hour before delivery, the team will call you to make sure you’re available to receive the order and double check any restrictions.

Ikea’s delivery network covers England, Scotland and Wales, but doesn’t extend to all outlying areas. Use the store’s Postcode Checker to see if your area is included. If you need to ship your items abroad, you will have to find a shipping agent to which Ikea will then deliver.

Ikea delivery cancellations

If you’re going to cancel your order, do so as soon as possible. Once the order is in the delivery channel, the process is difficult to stop. Note: You can’t cancel made-to-order products, for obvious reasons.

You receive a full refund for the product price when you cancel your order. You can also get a refund for the full delivery fee. However, in some instances you may be charged a return fee, which will be the same as the delivery fee.

(prices correct as of 19 July 2016)

Posted by Surewise in Appliance Insurance Articles

Our Easy Guide to 10 Common Oven Symbols & Functions

Our Easy Guide to 10 Common Oven Symbols & Functions

Have you ever looked at all the symbols on your oven and wondered what they actually all do? Most of us buy an oven with the hopes that it will serve us well for years to come, which is why maintaining your oven properly is essential. What’s more, you ideally want your oven to have all the cooking functions you need – but what oven symbols mean what?

Here, we’ve put together a full guide what what the oven symbols your oven has mean:

See our complete list of oven symbols below…

Ovens cooking functions are displayed on the front panel via symbols. Understanding these oven symbols is not only important for successful cooking but also important to keep your oven in good nick. Using them incorrectly could cause your oven to trip or fuses to blow and that’s a major inconvenience, even if you have good oven insurance.

To help you understand the various oven symbols and their baking/cooking functions, here are the ten commonly used symbols.

1. Fan oven

A fan in a circle represents an oven that uses a fan to distribute heat generated from a circular element that surrounds the fan. Ideally, the heat distribution should be even, so that it doesn’t matter where the food is placed in the oven, it cooks perfectly every time.

Fan ovens are designed to heat up faster, reduce cooking time and decrease energy consumption. Fan ovens are great for baking multiple trays at a time (biscuits, cupcakes and muffins on the top, middle and lower shelves respectively). They’re also recommended if you like your meat cooked the ‘chefy’ way, tender on the outside and rare on the inside.

If you have a combination oven and you want to use the fan, then the symbol won’t have a circle around the fan.

2. Conventional heating

The symbol for conventional heating is two lines, one at the top and one at the bottom of a square. The lines represent the two heating elements used, one at the top and one at bottom of the oven. Instead of a fan, the heat is diffused by natural convection. Use the conventional heating mode for roasting meat and vegetables or baking cakes.

3. Bottom element heat

The symbol is a single line at the bottom of a square, which represents the lower heating element in use. This method is ideal for baking something that requires a crispy base such as pizza. It is also used for baking a casserole.

4. Bottom element heating with grill

The symbol for this function is the zigzag (grill) line at the top and a straight line at the bottom of a square. It’s a good function to use for cooking pies, quiches, and crisping pizzas.

5. Fan with grill

The symbol is the zigzag line at the top of a square with the fan symbol underneath. The fan distributes the heat, while the grill roasts from the top. The grill cycles on and off to maintain the temperature setting. This method is ideal for cooking meat and poultry.

6. Grill

The symbol is simply a zigzag line at the top of a square. Using the full grill allows you to cook food for virtually your whole family plus guests. There may also be a half-grill setting, which means only the centre of the grill element gets hot. You’ll need to place food dead centre to get even cooking. Grills ate great for crisping and browning food, so use yours to make toast or toasted sandwiches, melt and brown cheese on lasagne and make delectable mushroom steaks.

7. Oven light

Rather obviously, the symbol is a light bulb in a square. Some ovens cook with the light on automatically so you can see progress easily, but other ovens have a light switch so that you have to turn it on and off to see what’s potting.

8. Oven defrosting

Not all ovens have a defrost function, but if yours does, you’ll see it on the symbol that looks like a snowflake above a drop of water. In this mode, the oven fan is switched on but no heat is generated. The air circulation defrosts the food. It’s great if you forgot to take food out to defrost overnight and you need to make a plan quickly.


9. Warming oven

The symbol is a dish with ‘steam’ lines rising above it. Use the function to keep food warm, without cooking it anymore. Food should stay moist and not dry out when using the warming function.

10. Plate warming

The symbol for this function is three dishes lined horizontally above one another. Dinner party etiquette dictates that you must serve plates warm. This setting keeps your plates safely warm without damaging the china.

Need Home Appliance Insurance?Why Surewise.com Benefits Reviews & FeedbackGet a Quote

Oven Symbols Guide:

Posted by Surewise in Appliance Insurance Articles

Want the Best in a Smartish Kitchen? Get Smart Appliances

Want the Best in a Smart-ish Kitchen? Get Smart Appliances

Consumers aren’t exactly queuing up jump on the smart home bandwagon. In fact, there isn’t even a bandwagon to jump on. Some manufacturers  are developing smart appliances in the hope that consumers decide they want their fridge to talk to their washing machine. One possible reason for the slow uptake is that it’s all too much for consumers. It’s also too expensive.

Most consumers prefer to test the water and start small, and that’s why manufacturers are changing focus from major appliances to small smart appliances and gadgets that won’t revolutionise our lives but will make them easier.

It starts small

These days, many basic appliances, like kettles, thermometers and frying pans have smart features, including Wi-Fi and touchscreens.

Let’s take a look at smart appliances on the market.

  • Kitchen scales

Connected kitchen scales don’t just ensure that your ingredients are weighed out to the correct tenth of an ounce, but they also connect to recipe apps so that you can download a recipe and then the scale will help you follow the recipe exactly.

Models currently available include Perfect Bake Pro (£40 to £50) and Drop Connected Kitchen Scale (£60 to £80).

  • Frying pans

If you’re an aspiring cook or just need to pull off the occasional tasty meal to surprise your partner, then you might appreciate the assistance of a smart frying pan. They also connect to apps (via Bluetooth) which provide step-by-step instructions, while the pan itself is able to regulate its temperature and provide you with temperature feedback. It tells you when it’s times to flip your meat or stir your stew or add new ingredients as per the recipe. You’ll also get suggestions for cooking time based on thickness of meat and on type of meat (steak, salmon, chicken)

Pantelligent Smart Frying Pan is currently available for around £170.

  • Coffee makers & kettles

Coffee makers are very trendy, so it makes sense that they would come with cool smart features. Many machines have apps that link them to your smartphone or tablet so that no matter where you are, you can set it to make coffee – and you can set it to your exact strength preference. The machines also tell you when you need to fill up the water and restock your capsules.

Smart kettles allow you to boil water no matter where you are in the house, and you can set it to a certain temperature so you can make speciality teas in exactly the right way.

Smart machines currently on the market include Nespresso Prodigio (£160), Smarter Coffee (£180), and Smarter Wi-Fi Kettle (£100).

  • Sous vide machines

Thanks to cooking programmes and celebrity chefs, sous vide cooking is becoming very popular. Now sous vide machines come with Bluetooth and Wi-Fi so you can set them to start cooking whenever you want, and you can download recipes and get step-by-step instructions to make the perfect sous vide meal.

Mellow sous vide cooker will be available in spring with an expected price of £265. The Anova Bluetooth + Wi-Fi Precision Cooker costs between £130 and £180.

  • Multicookers

Multicookers are already pretty cool machines, now they come with Wi-Fi, touchscreens and connected apps so you can find recipes and get step-by-step instructions to help you deliver maximum flavour.

The Breville Fast Slow Pro multicooker costs between £170 and £180.

For those who have everything, you can consider something a little different, like the iSommelier Smart Decanter. Now, digital settings allow your decanter to more effectively aerate your wine to soften tannins, and the digital screen on the base will tell you all you need to know about the wine, vintage and aeration process. You can also get information on different winemakers. Expect to pay around £1300.

Something with a bit more practical value is the Hero Smart Appliance which reminds you when you need to take medication, lets you know how much medication is left, and notifies you when medication has been taken, so you don’t have to second guess yourself, or worry whether dear old mom has remembered her heart medicine. Expect to pay around £700.

Need Home Appliance Insurance? – Cover for all your home appliances Click Here for a quote!
Posted by Surewise in Appliance Insurance Articles

Pick of the Best Home Theatre Surround Sound Systems

Pick of the Best Home Theatre Surround Sound Systems

Do you love the immersive sound experience when you go to the cinema? Of course you, who doesn’t? Do you want to bring some of the magic home with you? You can, thanks to the range of surround sound home cinema systems available on the market.

Some home entertainment systems represent a significant financial investment (they can cost in excess of £1500) and some are far more affordable. Whatever you pay for your system, however, you want to ensure that it is well protected against various risks, including breakdown and theft. This makes insurance something of a necessity.

Need Home Appliance Insurance? – Cover for all your home appliances Click Here for a quote!

What type of system do I need: Wireless surround sound, compact soundbar, 3D audio and visual capabilities?

The first thing you need to do is decide what type of sound system you want; for example, you can simply use a hi-fi system to ramp up your sound, or you can buy a sophisticated wireless home theatre system, or you can get a nifty, space-saving soundbar which mimics surround sound without all of the speakers.

If you go the home theatre route you can choose between 5.1 surround sound (3 front speakers, 2 rear speakers and a subwoofer) and 7.1 surround sound (which means you get 7 speakers and a subwoofer). All of those speakers come with a lot of wires, which can get messy and confusing. Fortunately there are some wireless surround sound options that are much neater to set up.

Home cinema systems are comprehensive, which means they usually come with a Blu-ray or DVD player, and also include 3D TV and audio options.

Soundbars (or sound bars, depending on the brand) don’t have external speakers, instead they have several speakers enclosed in a bar or base that can be placed in front of your TV or wall-mounted. The speakers are designed to mimic surround sound, so you don’t have to sacrifice sound quality just because you don’t have the space for 5 or 7 speakers. Some soundbars come with an external subwoofer so that you can get even better sound.

The option you choose depends on how much space you have, how fussy you are about sound and how much you want to spend. Soundbars are usually the cheapest and most compact option, and while the definitely offer good audio quality, they don’t provide the ultra-immersive surround sound that many people crave.

Home theatre systems with surround sound offer superior audio (provided you buy a good quality system) but the speakers do take up a lot of space and you may need someone to help you with installation if all the wires and connections intimidate you.

Connecting your hi-fi to your TV is the most basic and affordable option. You’ll get better sound quality than from your TV speakers and you can adjust the audio settings to suit you. You won’t get the surround sound experience though.

Features to look for

Good sound quality, obviously. The system needs deliver clear dialogue and the sound effects and background audio shouldn’t drown out dialogue.

Easy set-up is very important, especially if you’re going to do the installation on your own.

User-friendliness is also important, after all, you don’t want to breeze through the installation part and then spend the next few days trying to figure out how to open the DVD player.

Our pick of home theatre surround sound systems

  • Sony BDV-N5200W Home Cinema System

Winner of the best home cinema system of 2014, it also got 5 stars from What HiFi. It delivers crisp, immersive surround sound, great picture quality, compact speakers and it’s easy to set-up. The entire system consists of a Blu-ray player, 5 speakers, wireless subwoofer, compact amplifier, and a range of smart features.

Expect to pay around £500.

  • Sony HT-RT5 Hybrid Home Cinema System

This Sony model is a hybrid soundbar-surround sound system that may fall short on surround sound quality but still delivers clear sound and delivery. It comes with a subwoofer, and two rear wireless speakers, as well as 3 HDMI inputs and one output.

Expect to pay between £500 and £680.

  • Philips Fidelio B5 Soundbar Surround Sound System

This Philips home theatre system earned 5 stars for sound, build and features from What Hi-Fi? One of its selling points is its Bluetooth-powered multi-room surround sound speakers. All aspects of audio gel with one another, so you can clearly distinguish between the special effects, the dialogue and soundtrack. It comes with 2 HDMI inputs and one output.

Expect to pay around £550.

  • Ruark Audio R7 Mk2

The R7 earned 5 stars from TrustedReviews, thanks to the incredible sound from its CD player, FM internet radio, stereo speakers, Wi-Fi, Bluetooth and optional TV mount. The main unit can either sit on a sideboard, on its own feet, or on legs. The long retro-designed unit comes with a subwoofer and ‘one of the coolest remotes around, no question’. The optional AV/TV mount can accommodate televisions up to 50”, and comes with space for a satellite box and Blu-ray player.

Expect to pay around £2000.

  • Cambridge Audio CXN

The Cambridge Audio CXN also earned 5 stars from TrustedReviews. It comes with Wi-Fi and Ethernet (and optional Bluetooth), Spotify Connect and internet radio, incredible sound, and a 4.3” colour display. It may carry a high price tag, but the superior sound quality is deemed well worth it.

Expect to pay around £700.

  • Samsung R7

Another 5-star winner, the Samsung surround sound system is good looking, easy to use, delivers great sound and boasts a wealth of features, including Omni-directional sound, Bluetooth, Wi-Fi, and online music streaming.

Expect to pay around £500.

  • LG LHB725 Surround Sound Home Cinema System

This LG home theatre system earned 4 stars from ExpertReviews, thanks to great picture and sound quality and compact components. It boasts a 3D Blu-ray player, subwoofer, 5 speakers, Bluetooth, Ethernet port and wireless connectivity options. You can also choose between a multi-room setup and Private Sound mode.

Expect to pay between £300 and £400.

  • Pioneer SBX-N500 Soundbar

Another 4-star winner from ExpertReviews, the Pioneer Soundbar offers a quick and simple way to create a home cinema experience without taking up all the space of a proper 5.1 surround sound system. There are a range of connectivity options, including Bluetooth, Wi-Fi Direct, Ethernet, and HDMI and USB ports. The 2.1 speaker configuration offers great audio quality and the system supports MP3, WMA, and various AAC files.

Expect to pay around £250.

  • Yamaha YSP-5600 Soundbar

The Yamaha YSP-5600 soundbar is one of the best small home theatre systems on the market. The soundbar consists of a whopping 44 speakers and comes with 2 subwoofers that mimic 7.1 surround sound. It also has 6 ‘height’ channel speakers that provide the illusion of sound from above – a 3D audio experience. It comes with 4 HDMI slots, Wi-Fi, Ethernet, and Bluetooth.

Expect to pay around £1600.

  • LG LHB745 5.1 Smart 3D Blu-ray & DVD Home Cinema System

LG’s smart 5.1 surround sound system delivers a multi-layered audio experience, thanks largely to its Aramid fibre speakers. There is also a 3D Surround Processor that provides a fully immersive sound experience. It comes with built-in Wi-Fi, Ethernet and Bluetooth. Smart features include BBC iPlayer, YouTube, Netflix, and Amazon Instant, full web browser and access to apps from Premium Content Zone.

Expect to pay between £350 and £450.

  • LG BH9540TW 9.1 Smart 3D Blu-ray Wireless Home Cinema System

If you want a serious surround sound system for a fully immersive home theatre experience then you should consider this LG smart cinema system. You get 9 speakers, the rear of which are wireless. The Amarid Fibre Speaks and subwoofer make sure you feel the audio in your bones, without any distortion. What’s more, the system can upscale DVDs to HD quality as well as upscale HD to 4K, and convert 2D to 3D without compromising quality. Enjoy built-in Wi-Fi and Bluetooth for online media streaming, full web browsing and social networking.

Expect to pay between £700 and £800.

Need Home Appliance Insurance? – Cover for all your home appliances Click Here for a quote!
Posted by Surewise in Appliance Insurance Articles

Great Tips on How to Choose an Energy Efficient Kettle

Great Tips on How to Choose an Energy Efficient Kettle

Your kettle isn’t exactly a large appliance, so you wouldn’t think that it uses a huge amount of energy, right? It’s true on the surface, except that your kettle gets a LOT of use. On average, a UK household boils the kettle 1500 times per year. It’s not that difficult to believe if you consider that you might boil your kettle 4 times a day for coffee or tea and then perhaps another once or twice to cook food. All of that use adds up. According to Chris Goodall (cited by Ethical Consumer) your kettle can consume about 150kWh per yeah. This amounts to about 4% of your total electricity consumption.

Kinda scary, isn’t it?

One of the biggest problems is overfilling the kettle. If you’re only making one cup of tea or coffee, technically you need less than 500ml of water, but we tend to stick the kettle under the tap and just let rip, so we end up with enough water to make tea for a Sevens rugby team. Once again Ethical Consumer has a fun stat for us: Apparently if all the households in the UK boiled exactly the right amount of water they need for one day, the energy saved could light every street lamp in the country for one night.

Some kettle manufacturers have stepped up to stop the overfilling problem; for example, the ECO Kettle has 2 compartments so you can fill one with one cup of water to be boiled at a time. Some energy efficient kettles have lower water level indicators (minimum amounts to be boiled) so you can boil want you need, even if it is less than 500ml. And, because most elements are now under a plate, you don’t have to cover exposed elements with water you don’t need.

Another great feature that many kettle manufacturers are using is variable temperature control, so you can set the kettle to switch off when the water reaches a set temperature. For example, you can set your kettle to 70°C so that you can make the perfect cup of green tea.

More than energy efficiency?

Energy efficiency is one thing, but what do you know about manufacturers’ stance on human rights, animal welfare and transparency in their supply chains? These days, with the global village being as small as it is, we’re more aware of the need to protect or at least stand up for people who live on the other side of the world. Ethical Consumer takes transparency and workers’ and animal rights very seriously and when it reviews appliances it considers things like:

  • Supply chain policies: Are workers treated fairly, are they adequately remunerated, are working conditions safe? Supply chains that have components in China are usually problematic.
  • Environmental reporting: Transparency in environmental reporting is important, which means honesty when it comes to things like carbon emissions, water use and land use.
  • Company profile: Includes consumer boycotts for things like animal testing and financing drilling operations or fracking.

Choose an ethical and energy efficient kettle

Ethical Consumer uses a rating system out of 20 to determine which are the most ethical and energy efficient kettles. The list is interactive, so you can select the criteria that are most important to you and get truly relevant results. If all criteria are selected as important, the top kettles include:

  • Bodum Clara glass hob kettle (14)
  • Bodum electric kettle (14)
  • Dualit electric kettles (14)
  • ECO Kettle electric kettles (14)
  • Judge hob kettle (14)
  • Krups electric kettles (14)
  • La Cafetiere electric and hob kettles (14)
  • La Cafetiere hob kettles (14)
  • Magimax electric kettle (14)
  • Masteclass hob kettles (14)
  • Moulinex electric kettles (14)
  • Rowenta electric kettles (14)
  • Stellar electric and hob kettles (14)
  • Tefal electric and Quick Cup kettles (14)
  • Breville electric kettles (13)
  • Morphy Richards electric and hob kettles (9)
  • Prestige electric and hob kettles (8)
  • Braun electric kettles (7.5)
  • De’Longhi electric kettles (7)
  • Kenwood electric kettles (7)

The internet has made it super easy to be an ethical consumer, so why not take advantage of Google and hold large companies accountable for their business and manufacturing practices – and enjoy a cool kettle with all the energy and money savings that go with it.

Posted by Surewise in Appliance Insurance Articles

Discover 7 Simple Reasons Why Your Washer Dryer is Leaking

7 Simple Reasons Why Your Washer Dryer is Leaking

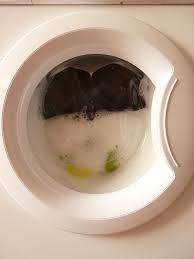
It has been one of those crazy days at the office. Then you rush to the shops, managing to arrive just before they close. Naturally, Murphy kicks in with his law again and you hit a traffic jam on the way back. You finally get home. But, just as you’re carrying in the groceries… what the…? Water all over the floor. Great. Just what you need – your washer dryer is leaking.

After laying out every towel in the house in a desperate attempt to sop up some of the soapy Brobdingnagian deluge, you resign yourself to the fact that the load you did this morning to ‘save time’ clearly had other ideas.

Now what?

There are a few reasons why your washer dryer is leaking. Here is a checklist you can run through which may help prevent the next flood. You can fix most of them yourself. But it’s always a good idea to get a professional’s help. It’s also important to remember you can void the warranty on your new machine if repairs are carried out by unregistered professionals.

So, why is your washing machine leaking?

  1. Excessive use of detergent and fabric softener

It’s important to use the correct quantity and type of detergent. Too much detergent in can lead to a build-up of excess foam in the machine. This causes water to leak through various outlets, including the detergent drawer. An overdose of fabric softener can cause similar results.

It may seem silly, but read (and follow) the specified amounts for the size of the load. Pay attention to what the manufacturer considers a small, medium or large load.

Although we all have budgets, you should try to avoid cheap, low-quality detergents, since they are prone to over-foaming. Penny-wise, pound-foolish and all that. You’re unlikely to be happy to have saved 40p on the washing load when you’ve just soaked Nana’s priceless Persian carpet. In the long run, with detergent as with all things, you get what you pay for. Low-cost detergent may also build up in your clothes and in the plumbing of the washing machine itself, causing more problems down the line.

  1. Overloading the machine

Yes, we all want to save time. It is our most precious resource and there is never enough of the stuff. But putting as much as we can into the machine is a false economy. When the machine is overloaded, the water does not drain properly. Instead it leaks out during the spin cycle. Overloading leads to residue build-up in the fabrics or the machine itself, since the water can’t flow freely. Those white marks on your favourite black jeans? Almost certainly a result of either cheap detergent or overloading.

It will save you much more time and money in the long run to simply load the machine as per the manufacturer’s guidelines with regards to the capacity of the wash drum. Sort of like putting too much food in your mouth and then trying to say ‘football’ – you will not be scoring any goals with any potential mates with that one. And having dirty clothes because of a broken washer is more than likely to have the same effect. Ultimately, as the saying goes, it’s better to “measure twice and cut once” than attempt to cram as much as possible in there.

  1. Leakage caused due to a blockage

Your washer dryer may appear to be leaking even when it is not in use.  This can be due to a leakage in the main water supply, rather than the washer dryer itself. Alternatively, if it leaks at the end of a cycle when water is being pumped out it can also be due to a blockage in the machine’s drainpipes caused by small garments (that is where your missing sock went, in case you were wondering) or, if you have animals, the blockage is likely from the hair left on your clothing. That water has to go somewhere, and it goes back into the washer dryer, causing overflow. This can then cause the water to flood and appear as if it’s leaking from inside the machine.

  1. Leaking hoses

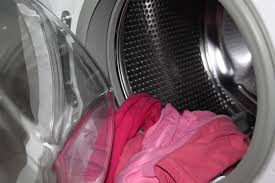
There is a variety of types of hoses used in a standard washing machine. But the most common are the ones that connect your water supply (fill hose) to the water inlet valve and the hose that drains the water from your washer. You will find the inlet water valve hose at the back of your washer (usually). It controls the entry of hot and cold water into your machine. If you notice that the leakage occurs primarily when the tub is being filled, the fill hose may be the culprit.

There are fittings that keep the fill hose tightly in place. Make sure that the thread on these fittings has not worn away. You can also obtain very good results from buying some plumber’s tape (also called thread seal or PTFE tape) and wrapping it a few times around the thread before refitting the hose. And you can check that the tap that the hose is connected to isn’t leaking either (this is very common if the washer in the tap hasn’t been changed in a while. It’s a cheap part, but unless you are 100% sure what you’re doing, a leaky tap is best left to the plumber).

If your machine leaks even when you are not using it, it may be that the water is building up too much pressure in the tap. With nowhere else to go to, it will eventually force itself out through the tap mechanism or the thread seal. Try turning the tap off when the machine is not in use.

Hoses continued ….

The other hose that drains the water away is also situated at the back of the machine (yes, it’s not exactly convenient, considering it takes the average person five attempts to get the machine away from the wall). Check that it is properly installed and far enough down the drain pipe. If the leak occurs during the wash part of the cycle, then this hose may be the problem. As per above, also check that there is no blockage in the outlet area of the pipe. It’s also a good idea to check that there are no blockages between the pipe and the drain. If the pipe is full of water, you have found the problem.

Washers also have internal hoses that connect the inlets and outlets to the actual tub of the machine. A worn hose here can also create a leak. You would need to get right into the machine to check these out, so unless you are confident you can lift the main top or remove the cabinet to check if the hoses have degraded in places, it’s best to call a plumber.

  1. Water drain pump

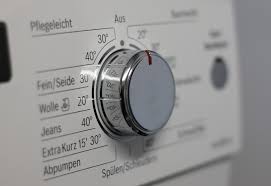
The water pump pumps water down the drain. Essentially, it drains the water from the tub of the machine. It can be belt-driven, direct drive or it could be a completely separate electric pump. It will have an outlet and an inlet pipe. If the leak occurs during the wash and/or drain cycle, it is likely that the water pump is your problem. The problem could be in either of the hoses; for example, the hoses connected to the pump could be loose because the thread on the fitting that tightens the hose to the machine is stripped, or the actual hose could be worn (nearly all waterproof substances are prone to weathering, either due to movement, pressure, or even the friction of whatever is being carried through the pipe).

If the connections and hoses seem to be in order, then, again, it is time to call that plumber. If you are brave enough to attempt it yourself, be sure to switch off all electrical power leading to the machine. You may be a bright spark for figuring out what the problem is but you’re likely to look less fetching when you’ve been lightly fried.

  1. Washer is unbalanced

This may seem like a small issue, but because the tub is moving so fast during the spin cycle, it causes a lot of movement. An unbalanced machine can be caused by having heavier clothes on one side of the machine (rare and difficult to prevent unless you group your washing by fabric type, such as putting all your towels in together) or simply because the feet of the machine have not been equally adjusted. This can be fixed by either raising or lowering each foot until the machine is balanced and stable. Remember that it is extremely hard to detect any height differences in a floor and something that may be invisible to the naked eye, like a dimple in the wood or tile, may cause your machine to vibrate. Apart from causing leaking, this will increase vibration and wear on the moving parts.

  1. The manufacturer’s drain plug

This is mentioned in the washer dryer’s manual (yes, it came with the machine when you first bought it. No, it is not written in code). You need to remove the drain plug or the washer won’t drain and will instead leave a nice big puddle. At least it will give you an opportunity to test those new Wellingtons you got for your birthday.

Some Soaps do eventually come to an end…

If your machine looks like something out of an H.G Wells’ book, you may have to face the horrid truth that you have to buy a new one. However, the coronation of your new washing machine could indeed become a reason to throw a party. And with no dirty laundry to be aired!

But please remember…

Appliances should be serviced regularly according to the manufacturer’s instructions found in the product manual. If you have a problem with an appliance, call in a NICEIC or Gas-Safe registered appliance engineer to repair your appliance. Don’t forget that if your appliance is not working optimally, you should also have it serviced to prevent further damage.

Need Home Appliance Insurance? – Cover for all your home appliances Click Here for a quote!
Posted by Surewise in Appliance Insurance Articles

Discover Our 3 Quick and Easy Oven Cleaning Home Remedies

3 Quick and Easy Oven Cleaning Home Remedies

Cleaning the oven is undoubtedly one of the most difficult aspects of keeping the kitchen looking pristine. Often it takes a great deal of physical strength to get the grease and grime off an extensively used oven. Worse still are the harmful smells of industrial-strength oven cleaners available in the market. Popular oven cleaners have highly caustic chemical such as butane and sodium hydroxide that can be hazardous to your family’s health.

The good news is that there are effective homemade solutions for oven cleaning that are safer not only for you but also for the environment. If your oven does not have a self-cleaning function, here are three relatively chemical-free ways of keeping your oven sparkling clean.

1. Baking soda with water

Use water and large quantities of baking soda to make a paste. The baking soda paste does not have an unpleasant odour like the harsh oven cleaners available in the market. Apply generous amounts of the paste to the walls and doors of your oven using a cloth. Spread the paste evenly. Let the paste remain for a couple of hours. This softens the stains, which can now be removed using a wallpaper scraper. Use a soft cloth dipped in warm water to wipe clean any residual paste and stains on the oven. Your oven will now be sparkling clean.

2. Lemon juice with water

Citrus oils have natural degreasing properties. Cut two lemons and squeeze the juice onto a baking dish that is one-third full of water. Place the lemon pieces in the dish as well and put the dish in the oven at a low temperature for about half-an hour (or longer depending on the state of the oven). The vapours from the lemon solution loosen the grime stuck on the oven walls. Turn off the oven, remove the baking dish, and let the oven cool. Remove the grime in the oven using a scouring pad, the same lemon solution, and a sponge. Wipe dry with a soft cloth. This technique is great for cleaning convection ovens.

3. Baking soda and vinegar

Spray vinegar inside the oven and sprinkle baking soda over it.  Allow the mixture to fizz for 30 minutes to an hour depending on how bad the grime situation is. Like the lemon juice method, scrub the walls and base of the oven using a scouring sponge. Since vinegar is a great degreaser, dip the sponge in vinegar as you scrub.  Wipe clean the oven using water and a soft cloth.

If you have been using chemical oven cleaners, perhaps it is time you tried one of these homemade oven-cleaning solutions that are safer for your family as well as the environment.

Need Home Appliance Insurance? – Cover for all your home appliances Click Here for a quote!
Posted by Surewise in Appliance Insurance Articles